1, Install opencv
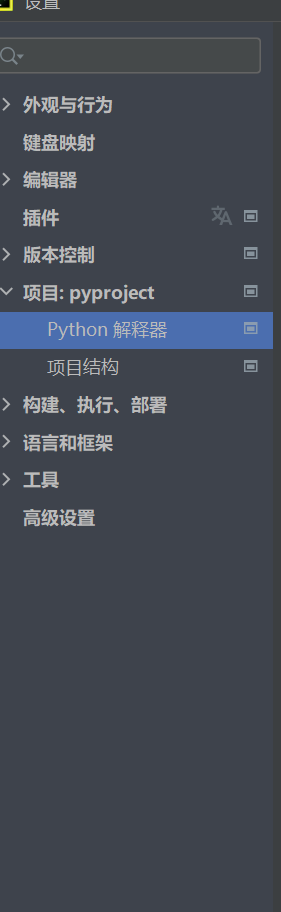
For the installation of OpenCV, if you use pycharm under windows system, you can directly use the pip command on the terminal or click the setup Python interpreter to enter opencv python
If you are using conda, you can also use the pip command or conda install to install
It's easier under linux. It will also reduce many unexplained bug s. It is recommended to use linux system. Under linux, use the terminal to input pip or PIP3 to install opencv python, provided that Python has been installed and the path variable has been set.
2, opencv using
To use opencv, you must import the opencv package at the beginning of the code. The name here is different from that during installation. Use the command:
import cv2
Import package. And you need to install matplotlib and numpy.
1. Picture reading
img = cv2.imread("car_green.jpg")
The name of the picture file is in parentheses. You can do this if the code and the picture are in the same directory, but if they are not in the same directory, you need to include the full path of the picture file. Using this statement to read an image will return a matrix of ndarray type (number of rows, columns and channels)
Display the picture just read:
Note: the image format read by opencv is BGR format.
cv2.imshow("name", img)
# Wait time, in milliseconds, 0 indicates any key termination
cv2.waitKey(0)
2. Get video stream from camera
def video_get():
    capture = cv.VideoCapture(0)
    # Save every frame of the video stream
    while True:
        ret, frame = capture.read()
        # Flip the image. The original image is reversed left and right
        frame = cv.flip(frame, 1)
        cv.imshow("video", frame)
        c = cv.waitKey(50)
        if c == 27:
            break
3. Save the acquired image
cv.imwrite(File path to save, image file)
4. Gray image conversion
When reading, it is directly read as a grayscale image:
img = cv2.imread(path, cv.IMREAD_GRAYSCALE)
It is read in color and converted into gray image
img = cv.imread("car_red.jpg")
img = cv.cvtColor(img, cv.COLOR_BGR2GRAY)
cv.imshow("ing", img)
cv.waitKey(0)
cv.destroyAllWindows()
5. Get part of the image
Since the read picture is of darray type, you can use the slice operation to obtain a part of the image:
roi = img[ start:end, start:end]
6. Split and merge channels of color pictures
Because color pictures are three channels, assuming that the picture size is 128x128, it contains three 128 * 128 color matrices
img = cv.imread("car_red.jpg")
cv.imshow("img", img)
# Note that the format is BGR
b, g, r = cv.split(img)
# Channel merging, pay attention to the order of the matrix, so that the synthesized image is in BGR format
img = cv.merge((b, g ,r))
cv.imshow("img1", img)
cv.waitKey(0)
cv.destroyAllWindows()
After the three channels are extracted, each channel is actually a separate gray image if displayed, because the number of channels in the image becomes 1.
If you want to display a color in RGB, you can use slice to change other color channels to 0
7. Boundary fill
Fill the picture with Boundary:
cv.copyMakeBorder(img, 50, 50, 50, 50, borderType=cv.BORDER_REFLECT)
The parameters are the image source and the filling distance (50, 50, 50, 50), and the borderType parameter represents the filling method.
BORDER_ Duplicate: copy method, copy the most edge pixels of the picture
BORDER_REFLECT: reflection method, which copies the image pixels of interest on both sides
BRDER_REFLECT_101: reflection method, with the most edge pixel as the axis
BORDER_WRAP: outer packaging method
BORDER_CONSTANT: constant method, constant value filling
Remember to define a variable in front of the function to accept the return value of the function.
8. Image size change
Use the resize function to modify the picture size
red = cv.imread("car_red.jpg")
# Tuples in parentheses represent the length and width of the picture, that is, for the columns and rows of the matrix
red = cv.resize(red, (475, 245))
The size of the image is expressed by length and width. The size of the matrix uses rows and columns, and the length of the corresponding image corresponds to the column of the matrix. Therefore, it should be noted that whether the input size is the image size or the matrix size is no difference for the square matrix, but it has a great impact on other matrices.
Another method is to change the image by specifying the expansion multiple of x and y axes without specifying its size.
red = cv.resize(red, (0, 0),fx=3, fy=4 )
9. Image fusion
If the matrix can be added, it must be of equal size. After the two images are processed into images of the same size, the image fusion operation can be carried out.
green = cv.imread("car_green.jpg")
print(green.shape)
red = cv.imread("car_red.jpg")
red = cv.resize(red, (475, 245))
print(red.shape)
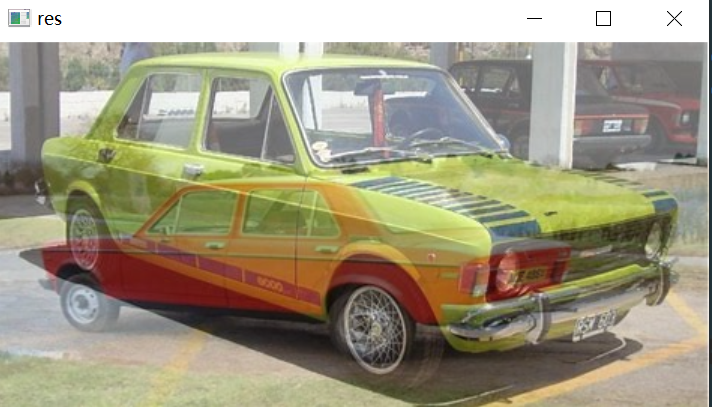
res = cv.addWeighted(red, 0.4, green, 0.6, 0)
cv.imshow("res", res)
cv.waitKey(0)
cv.destroyAllWindows()
The essence of image fusion is matrix addition. The above function can be regarded as a formula:
F = ared + bgreen + c
Where a = 0.4, B = 0.6, C = 0, these coefficients can be set by ourselves
The processed pictures are as follows: