Android Studio integrated cloud video SDK has integration development documents in the developer center of cloud video, but I found some problems in the process of my own integration and asked cloud video related staff to solve them.
I integrate the multimedia services of cloud video and submit the test environment Certificate - SDKAPI joint commissioning management. In the sdk test process (APP running process), InitActivity needs to select the checkbox of the "test environment". The enterprise development should have the corresponding production environment Certificate - SDKAPI joint commissioning management.
First, let's talk about the operation steps for the normal operation of the SDK (if you want to directly integrate the SDK, please find it directly below Integration SDK process):
Official website: https://uc.ipower.10086.cn/
1. After registering and logging in, click the developer center, client integration, Android, SDK download, and then download the latest version of SDK
2. Click the developer center, integrate video and voice conference and Application guide, and you will see the following paragraph. Just follow it. Generally, you need to wait a few days and get a reply.
"Download the SDKAPI joint commissioning management template. xlsx and fill it in as required. Fill in the basic information and functional requirements of the project. Send the completed SDKAPI joint commissioning management template. xlsx email to the cloud video developer's public email YSX-develop@chinamobile.com . ”
3. Click the developer center, client conference, API document and virtual account access guide to see the pdf document with virtual account access guide below. Operate according to the pdf document to obtain the token.
Note:
1. In the sdk test process (APP running process), after InitActivity clicks "next", it will enter LoginActivity. This page needs to enter the account and password. Because I am a test environment, I have no account and password, and the test environment can only log in through token.
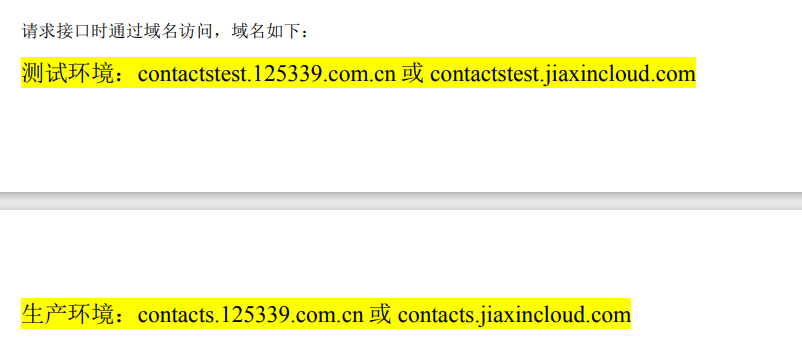
2. It is necessary to operate under the public IP with the white list added in the SDKAPI joint commissioning management. Under the public IP, obtain the virtual mobile phone number through the POST request and the token through the GET request. First obtain the virtual mobile phone number through the POST request, and then use the virtual mobile phone number to obtain the token. The token is time-effective. After it fails, just obtain the token again.
3. POST request: the host in the request URI, that is, the domain name, is added according to whether you are a test environment certificate or a production environment certificate:
The requested parameter is a JSON string, in which the sign in the JSON string is generated according to the pdf document,
The parameters required to generate the sign of the virtual mobile phone number are as follows:
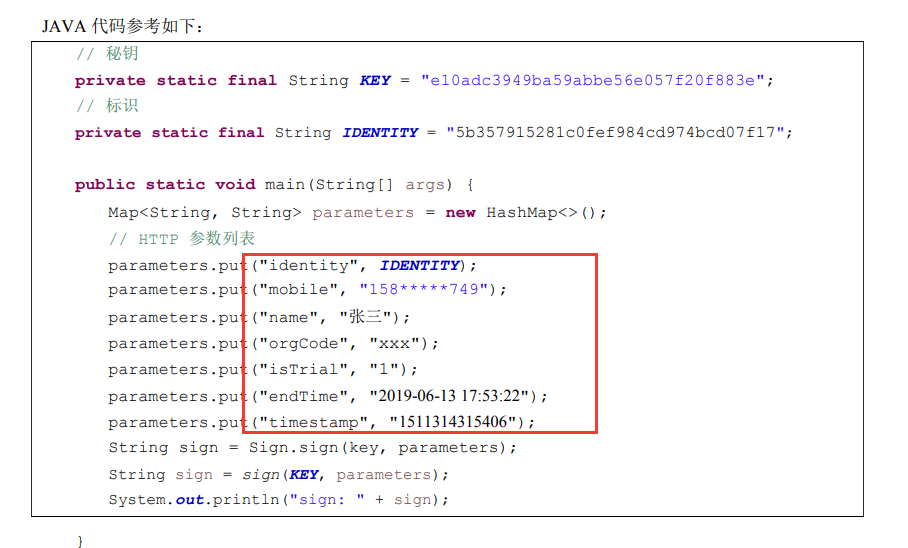
After the virtual mobile phone number is successfully generated, the token must be generated through the virtual mobile phone number. The parameters required to generate the sign of the token include mobile (virtual mobile phone number), timestamp and identity, as follows (that is, what parameters you need to request to obtain the token, you can use the parameters you requested to generate the sign to obtain the token):

By now, you should have got your token and sent it to the APP_KEY and app_ Fill the secret into the downloaded sdk and run it
OK, now it can run. Let me talk about the process of integrating SDK:
1. The three so files, ysxcommonlib aar,ysxmobilertc.aar and ysxsdk AAR, put it in the lib directory of the project
2. In app build Configuration file in gradle file:
(1)
//Four officially marked:
implementation(name: 'ysxcommonlib', ext: 'aar')
implementation(name: 'ysxmobilertc', ext: 'aar')
implementation(name: 'ysxsdk', ext: 'aar')
implementation 'androidx.recyclerview:recyclerview:1.0.0'
//The following is what I added by comparing sdk:
implementation 'io.jsonwebtoken:jjwt:0.9.0'
implementation 'com.android.support:multidex:1.0.3'
implementation fileTree(include: ['*.jar'], dir: 'libs')
implementation 'androidx.legacy:legacy-support-v4:1.0.0'
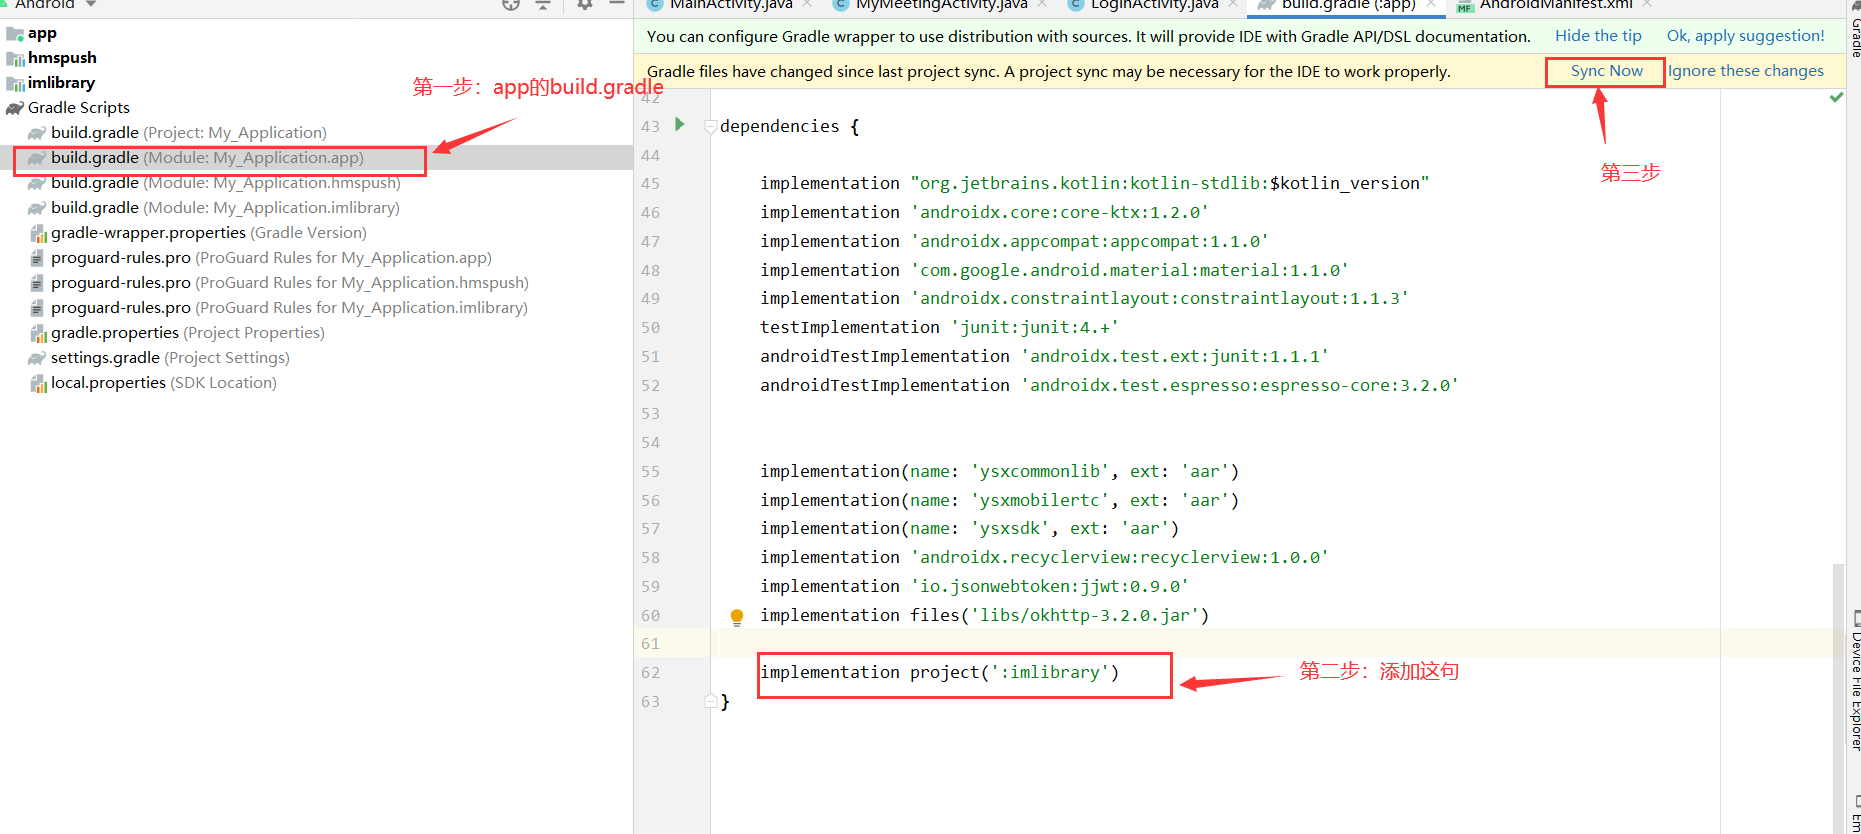
implementation project(':imlibrary') //For im integration, you need to add it after IM integration
(2)
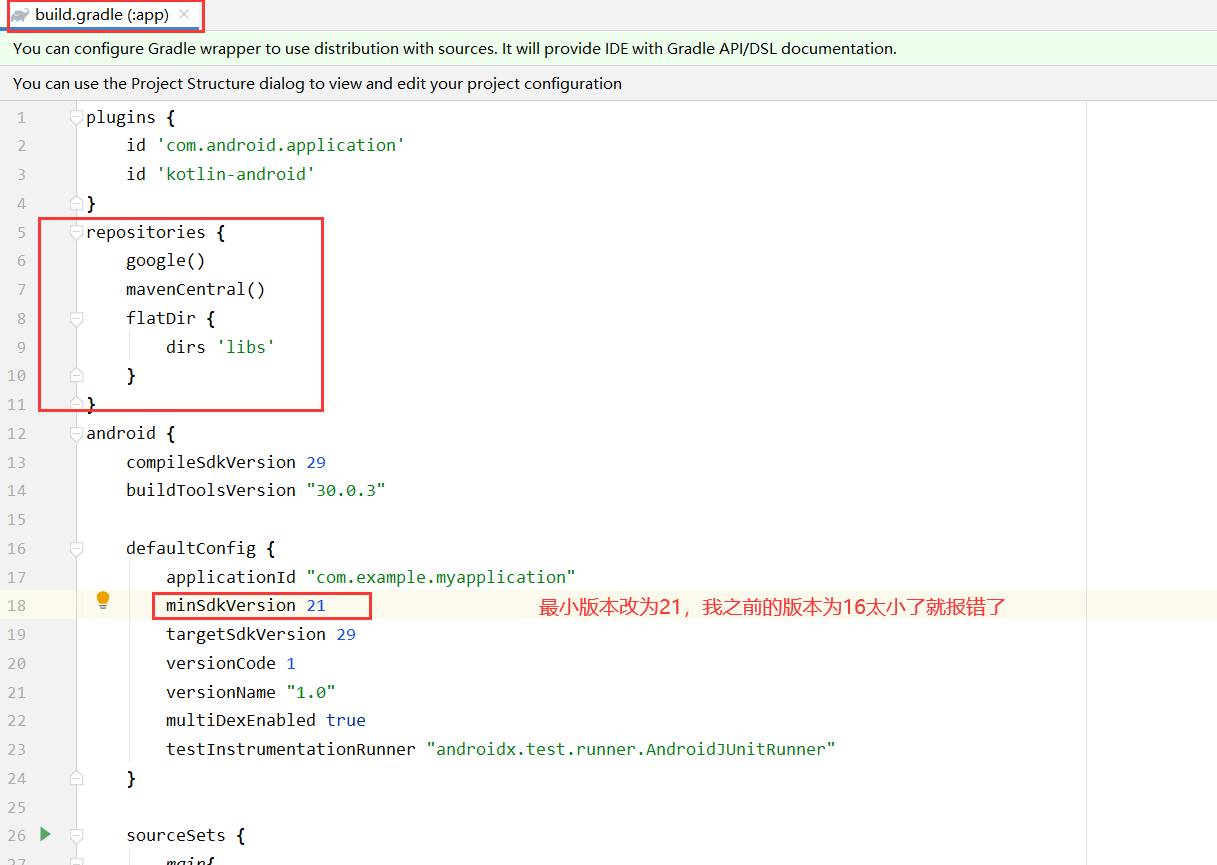
repositories {
    google()
    mavenCentral()
    flatDir {
        dirs 'libs'
    }
}
I only added these in gradle. There is another sentence in the official sdk, as shown in the figure below. You can add it yourself according to the situation

ndk { abiFilters "armeabi-v7a","arm64-v8a","x86" }
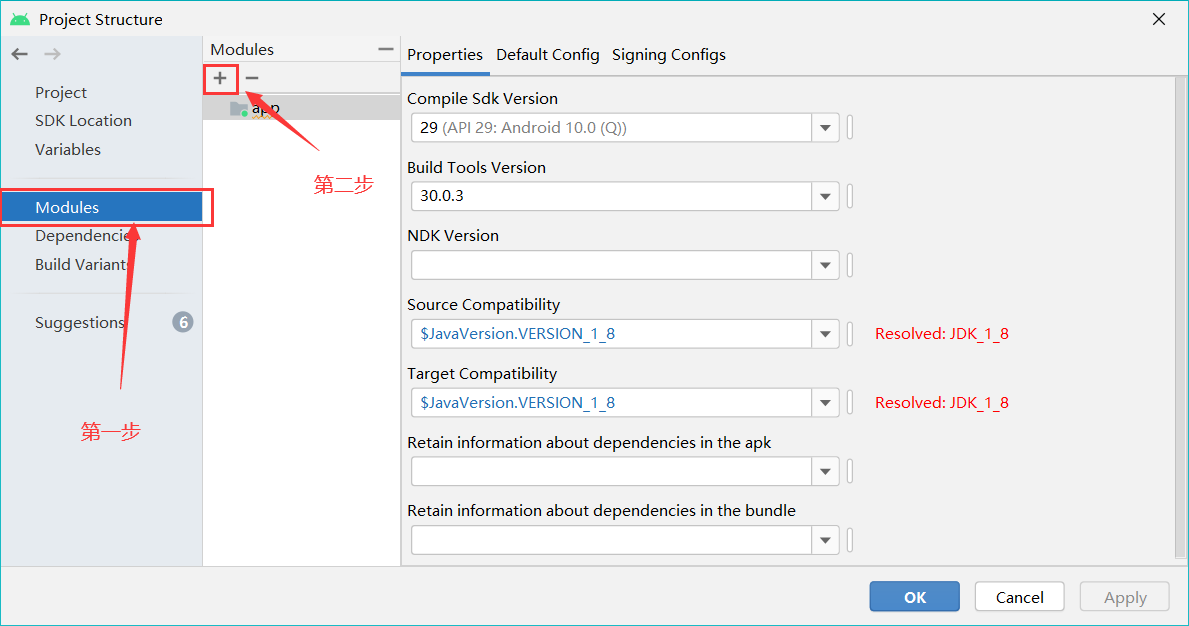
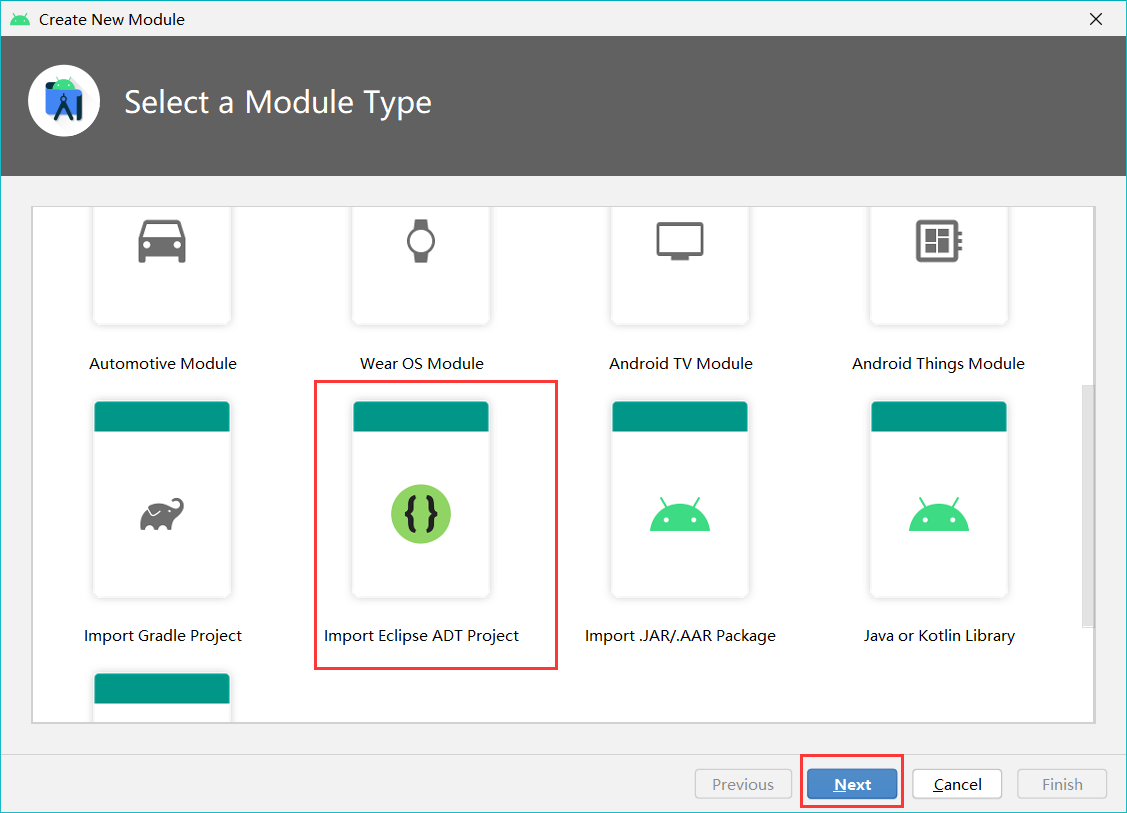
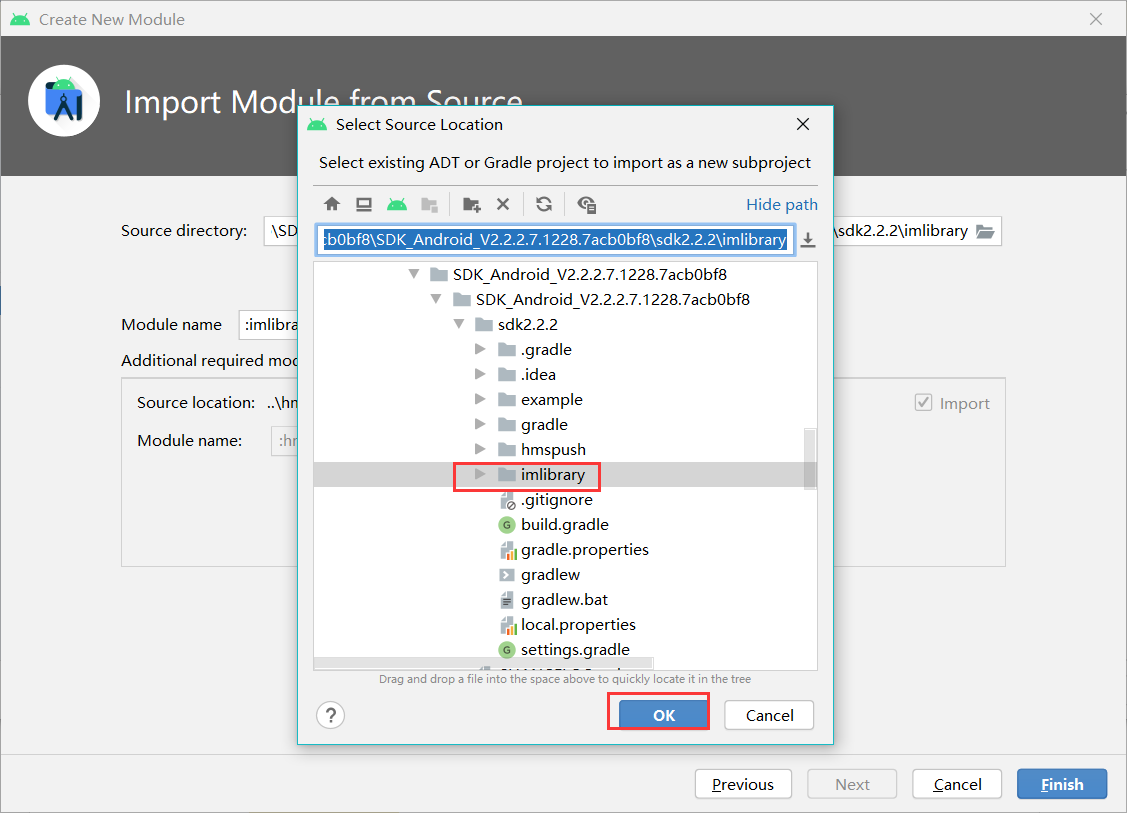
3. Integrate imlibrary, i.e. IM communication, into your own project. Please skip the steps
IM integration
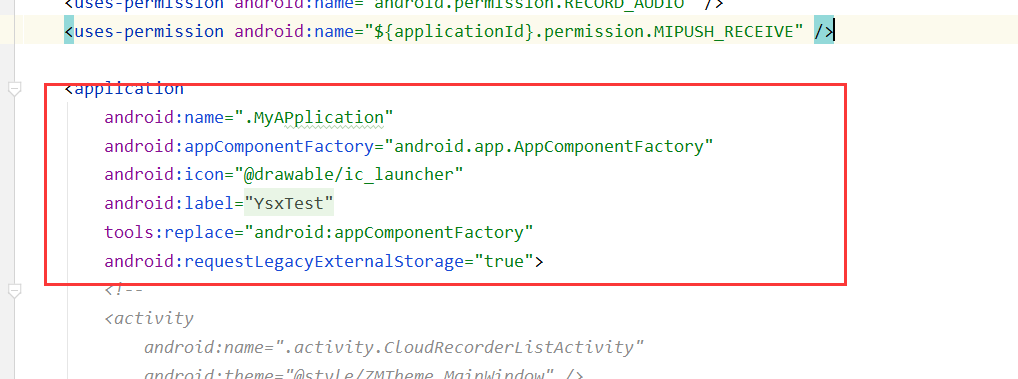
4,Mainifest.xml file permissions (just a reminder):
<!-- sdk Required permissions -->
    <uses-permission android:name="android.permission.DISABLE_KEYGUARD" />

    <permission
        android:name="${applicationId}.permission.MIPUSH_RECEIVE"
        android:protectionLevel="signature" />

    <uses-feature android:glEsVersion="0x00020000" />

    <uses-permission android:name="android.permission.WRITE_EXTERNAL_STORAGE" />
    <uses-permission android:name="android.permission.INTERNET" />
    <uses-permission android:name="android.permission.READ_PHONE_STATE" />
    <uses-permission android:name="android.permission.ACCESS_NETWORK_STATE" />
    <uses-permission android:name="android.permission.ACCESS_WIFI_STATE" /> <!-- Mi Push configuration start -->
    <uses-permission android:name="android.permission.SYSTEM_ALERT_WINDOW" />
    <uses-permission android:name="android.permission.READ_EXTERNAL_STORAGE" />
    <uses-permission android:name="android.permission.RECORD_AUDIO" />
    <uses-permission android:name="${applicationId}.permission.MIPUSH_RECEIVE" />
5. Pay attention to this, too
Note:
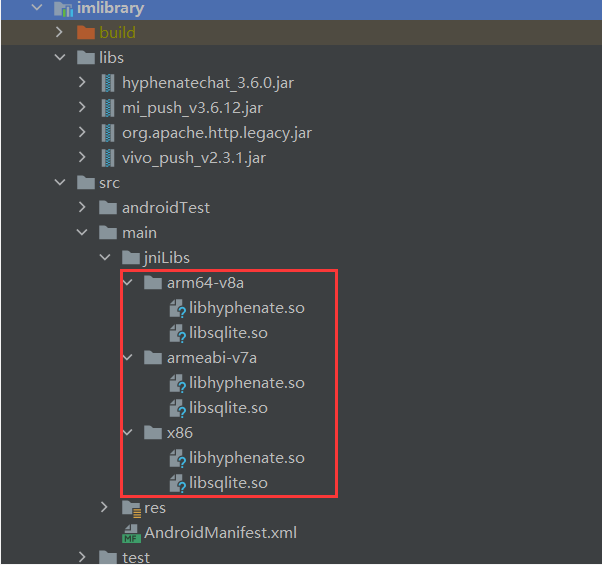
1. Directory of three so files:
2,build.gradle file configuration (according to sdk):
(1) The version of recyclerview is based on sdk
implementation 'androidx.recyclerview:recyclerview:1.0.0'
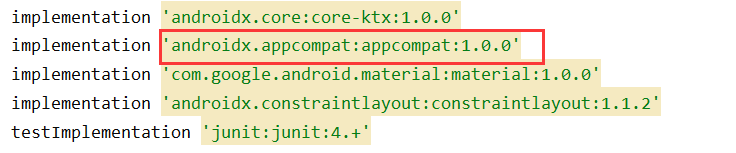
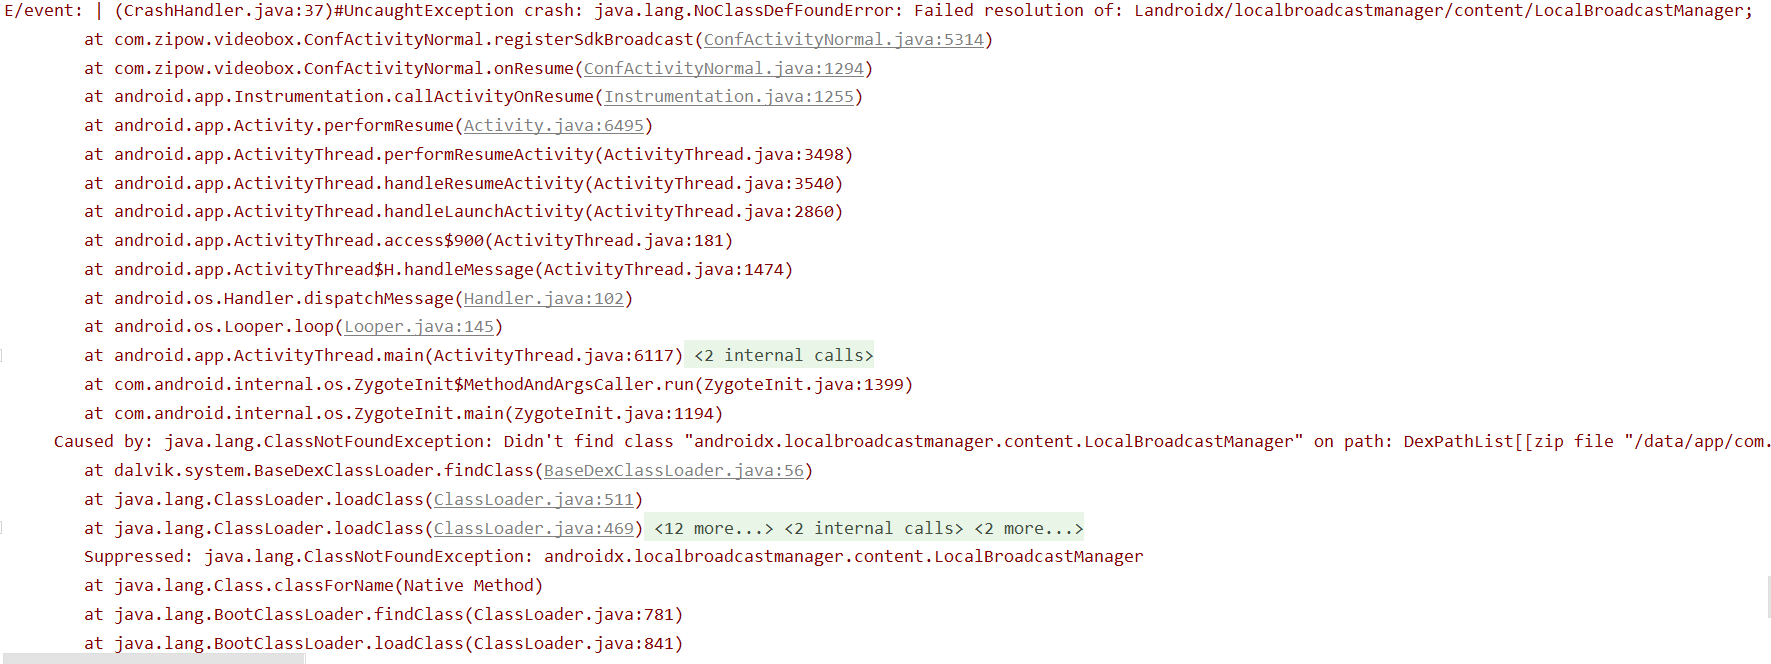
(2) The version of Android x should be set to 1.0.0 (according to the sdk). Because 1.1.0 invalidates the local broadcast, I will report an error when running. Without "implementation 'Android. Legacy: legacy-support-v4:1.0.0'", I also report an error when running. The screenshot of the error is as follows
The screenshot of error reporting is as follows:
3. If the following error is reported, it indicates that IM is not integrated (i.e. imlibrary is not imported)

Let's talk about how to integrate IM

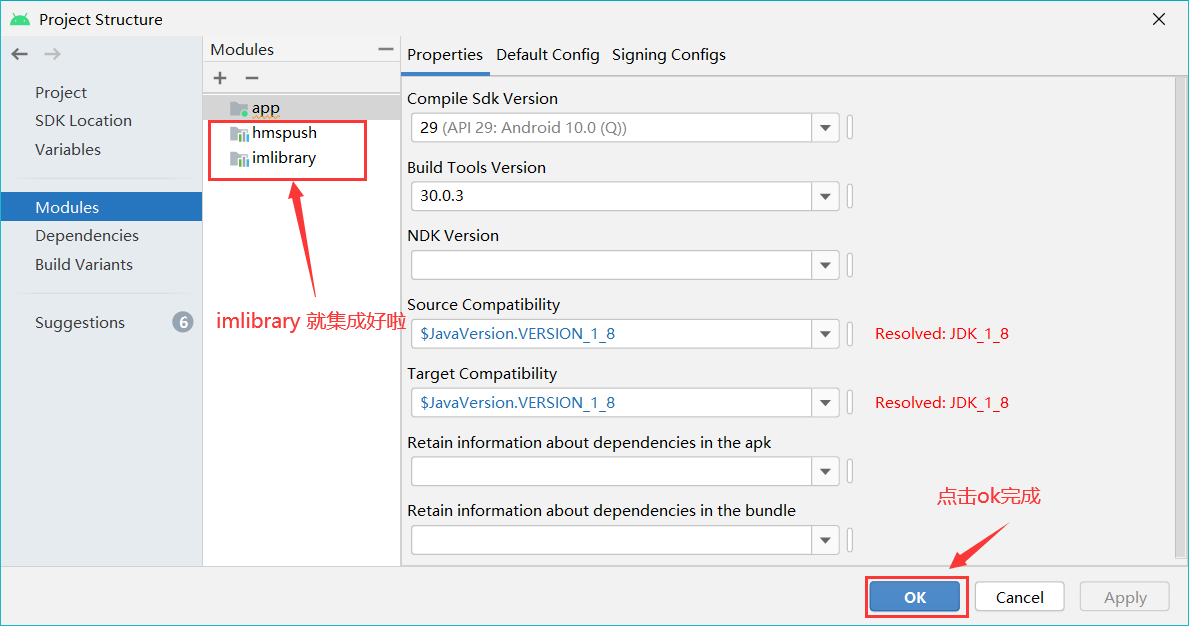
IM integration is complete~
At this point, the sdk integrated into your project should be able to run. I hope this article can help you (✪ ω ✪)