Raspberry pie face recognition access control requirements
Face recognition access control application has been very popular. This paper will describe in detail how to realize face recognition access control application with raspberry pie. There are two functions to be realized:
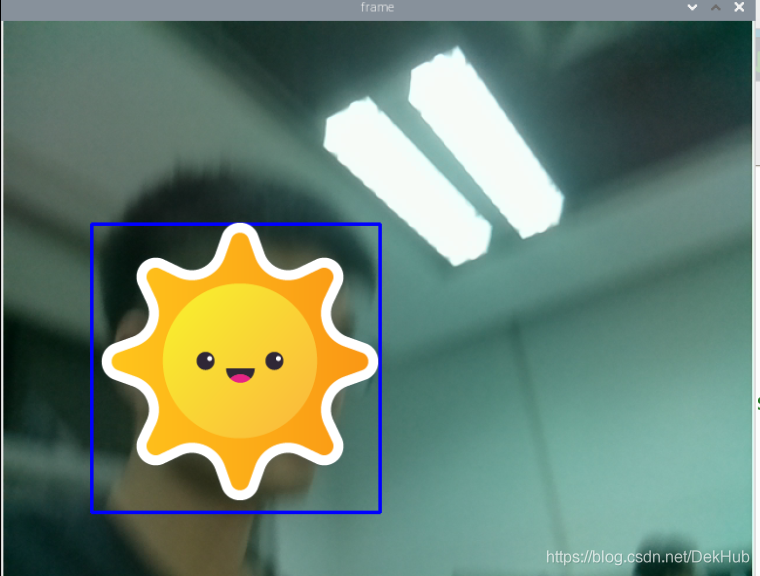
1. Detect the face, draw the recognition frame and track it in real time
2. Face recognition
Environment construction
Realize face recognition in raspberry pie. The programming language is python. The version can be python2 or python3. opencv and face are required_ Recognition library.
Install Cmake
Installing opencv and face_ Before recognition, to confirm whether a newer version of cmake has been installed in raspberry pie, use the following instructions to install the latest version of cmake:
sudo apt install cmake
Install OpenCV
If it is based on python2 and pip is installed, you can install it directly by using the following instructions:
sudo pip install opencv-python -i https://pypi.tuna.tsinghua.edu.cn/simple
If you are using python3 and pip3, you can use the following instructions:
sudo pip3 install opencv-python -i https://pypi.tuna.tsinghua.edu.cn/simple
If the installation fails unfortunately, the latest version of opencv may not support raspberry pie. You can try to specify the version. In order to avoid the problem of slow network speed of foreign image source, the installation of this paper is based on Tsinghua image source.
sudo pip3 install opencv-python==3.4.3.18 -i https://pypi.tuna.tsinghua.edu.cn/simple
If the lib dependency is missing, you need to install the dependency first:
sudo apt install libatlas-base-dev

sudo apt install libjasper-dev

sudo apt install libqtgui4

sudo apt install libqt4-test

sudo apt install libhdf5-dev
You can also refer to the article of cmake installing opencv, which is very troublesome and not easy to succeed.
Installing dlib
Installing face_ dlib needs to be installed before recognition. To determine_ dlib version of recognition requirements, you can go to github View, or try installing:
sudo pip install face_recognition #If it is Python 3, remember to replace it with pip3, which will not be repeated in this article
Although install face_ dlib will be installed automatically during recognition, but it will not succeed. If it succeeds, congratulations on completing the stage of environment construction. Otherwise, you need to go Official website Download the corresponding version of dlib and select the latest version. It's basically right. At least it should exceed face_ The version required by recognition.

After downloading to the local, perform the following steps:
- Open the terminal and input instructions to view the virtual memory size
sudo nano /etc/dphys-swapfile
Because installing dlib requires a large amount of memory, if you open the desktop GUI, 1GB of memory is not enough. You need to set aside a part of the disk as virtual memory. The default virtual memory size of 100MB is not enough. As shown in the figure, the installation of dlib will fail.

It is recommended to change it to 2048MB. If you open the GUI for dlib installation. After modification, Ctrl+O to save, enter enter, and Ctrl+X to exit.
- Update virtual memory configuration
sudo /etc/init.d/dphys-swapfile stop
sudo /etc/init.d/dphys-swapfile start
- Unzip the downloaded dlib file and enter the unzipped folder
sudo python setup.py install
- Just wait patiently. The installation is very time-consuming. You can have a cup of coffee first.
Install face_recognition
Due to the previous steps, this step is very simple. You only need to enter the following instructions.
sudo pip install face_recognition
Check whether it is installed:
pip list
At this point, the environment construction is completed. If you don't want to watch me talk, you can directly jump to Complete code and achievement display.
Face detection and tracking
Get video
A video can be regarded as a continuous picture. To obtain video from the camera is to obtain a frame of pictures. First, the program needs to obtain camera resources. The code is as follows.
import cv2
camera = cv2.VideoCapture(0)
Parameter 0 is the default camera. If there are multiple cameras, it can be changed to the corresponding drive number in / dev.
ret,frame = camera.read()
cv2.flip(frame,1)
frame is the picture read from the camera. Due to the problem of self photographing and mirroring of the camera, I turned it horizontally, which is optional and does not affect the result.
cv2.imshow("window_name",frame)#Window name arbitrary
cv2.waitKey(1)
imshow function can display the obtained picture in the window. waitKey function must be added to raspberry pie, otherwise the window may not be created. Through a while loop, you can continuously read frames of pictures from the camera and display them in the window, which constitutes the video. If the number of pictures displayed on the window is less than 24FPS, a Caton visible to human eyes will appear. This number of frames is also an indicator to consider the performance. The higher the number of frames, the smoother, the faster the recognition algorithm, and the better the performance.
Face detection
The requirement of face detection and tracking is to find the position of face in the picture and mark it. There are many ways to realize this function:
- Use face_ Functions of recognition library
- Detect the face and obtain the face position. The return value is list type
faces = face_recognition.face_locations(frame)
- Draw a rectangle on the picture to identify the position of the face
cv2.rectangle(frame,(faces[0][1],faces[0][0]),(faces[0][3],faces[0][2]),(255,255,0),2)
- Face detection is realized by using haarcascade in opencv:
- First, load the xml model of harr cascade classifier, which can be downloaded in github or trained by yourself.
faceCascade = cv2.CascadeClassifier("haarcascade_frontalface_default.xml")
- Face detection
def get_faces(frame):
    gray = cv2.cvtColor(frame, cv2.COLOR_BGR2GRAY)#Convert the picture to gray image to reduce the amount of calculation
    faces = faceCascade.detectMultiScale(gray)
    return faces, frame
- Draw a rectangle on the picture to identify the position of the face
cv2.rectangle(img, (faces[0][0],faces[0][1]),(faces[0][2]+faces[0][0],faces[0][3]+faces[0][1]),(255,255,0),2)
Summary: face_recognition is based on neural network model, while harr cascade classifier can be understood as:
Haar classifier = Haar like feature + integral graph method + AdaBoost + cascade;
a) Haar like feature is used for detection.
b) The evaluation of Haar like features is accelerated by using integral image.
c) AdaBoost algorithm is used to train a strong classifier to distinguish face and non face.
d) The classifier is cascaded together by filter cascade to improve the accuracy.
harr cascade classifier has the problem of high re recognition and false recognition, that is, a face is recognized multiple times and a non face is recognized as a face, which is collectively referred to as the error rate (missing recognition is not considered here). The error rate can be found in Comparison of several xml models based on harr cascade classifier github.
Face tracking
To realize the face detection on the picture, we need to further realize the face tracking on the video. The biggest difficulty is how to ensure the tracking of the face while ensuring the fluency of the video. Here, the number of frames is used to measure fluency.
- Single thread
- Test code of harr cascade classifier:
import cv2
import time


######################
########config########
######################

faceCascade = cv2.CascadeClassifier('/home/pi/haarcascade_frontalface_default.xml')
start = time.time()
frame_num = 0


#check the exist and location of the face

def get_faces(frame):
   gray = cv2.cvtColor(frame, cv2.COLOR_BGR2GRAY)
   faces = faceCascade.detectMultiScale(gray)
   return faces, frame


#sign the face location in the image

def sign_faces(img,faces):
  for (x,y,w,h) in faces:
    cv2.rectangle(img, (x,y),(x+w,y+h),(255,0,0),2)
    cv2.imshow("frame",img)
    cv2.waitKey(1)


# main function

if __name__ == "__main__":
   camera = cv2.VideoCapture(0)
   while True:
        ret,frame = camera.read()
        faces,frame=get_faces(frame)
        sign_faces(frame,faces)
        frame_num = frame_num+1
        fps = frame_num/(time.time()-start)
        print(fps)
The number of frames fluctuates in the range of 6-10 frames, and the video is obviously stuck.
- face_ Test code of recognition:
import cv2
import face_recognition
import time

######################
########config########
######################

start = time.time()
frame_num = 0


# check the exist and location of the face

def get_faces(frame):
    faces = face_recognition.face_locations(frame)
    return faces, frame


# sign the face location in the image

def sign_faces(img, faces):
    if(len(faces)>0):
        cv2.rectangle(frame, (faces[0][1], faces[0][0]), (faces[0][3], faces[0][2]), (255, 255, 0), 2)
        cv2.imshow("frame", img)
        cv2.waitKey(1)


# main function

if __name__ == "__main__":
    camera = cv2.VideoCapture(0)
    while True:
        ret, frame = camera.read()
        faces, frame = get_faces(frame)
        sign_faces(frame, faces)
        frame_num = frame_num + 1
        fps = frame_num / (time.time() - start)
        print(fps)
FPS < 1, the video is similar to ppt, but there is almost no detection error (excluding missing recognition).
Summary: single thread can't reach 24 frames per second when the camera has the largest pixel, which can't meet the demand. Therefore, it is necessary to increase the number of frames by reducing the pixels of each frame and extracting frames.
- Reduce the image quality and detect one image every four images
def get_faces(frame):
    gray = cv2.cvtColor(frame, cv2.COLOR_BGR2GRAY)
    faces = faceCascade.detectMultiScale(gray)
    return faces, frame


# sign the face location in the image

def sign_faces(img, faces):
    for (x, y, w, h) in faces:
        cv2.rectangle(img, (x, y), (x + w, y + h), (255, 0, 0), 2)
        cv2.imshow("frame", img)
        cv2.waitKey(1)


# main function

if __name__ == "__main__":
    camera = cv2.VideoCapture(0)
    #Reduce image quality
    camera.set(3,320)
    camera.set(4,240)

    i = 0
    while True:
        ret, frame = camera.read()
        if(i==0):
            faces, frame = get_faces(frame)
        sign_faces(frame, faces)
        frame_num = frame_num + 1
        fps = frame_num / (time.time() - start)
        print(fps)
        i=(i+1)%4
The number of frames jumped to nearly 30, but due to the rush process of the print function, the picture is not displayed. The code for calculating fps is commented out, and the video still does not reach the ideal fluency. There is a certain error in the calculation of the number of frames. Considering the face recognition function, there should be a large margin for the number of frames.
- Four thread
Considering that raspberry pie is a 4-core cpu, you can also increase the number of frames through multithreading. The code is a little long, so I won't post the code here.
Test results: the number of frames has not increased as much as expected, but the most important thing is that the video will not be blocked in a certain frame during face detection. If face is used_ Recognition face detection can only use multithreading, otherwise it can not meet the requirements.
Face recognition
Selection of identification methods
Face recognition can also use harr cascade classifier and face_recognition has two methods. The former is a traditional computer vision algorithm, and the latter is a neural network model.
| Recognition speed | error rate | |
|---|---|---|
| harr | <2s | higher |
| face_recognition | About 2 seconds | Lower |
By analyzing the business logic, it can be seen that from a user entering the camera picture to leaving the picture is a recognition task. In the same recognition task, only one face recognition is required, rather than face recognition for each picture. Then the difference between the recognition speed of the two implementation methods is not a decisive factor, but considering the needs of security, the error rate is the most critical factor. So face_recognition is better than harr cascade classifier.
Business logic
Such business logic also solves the problem that harr cascade classifiers attach importance to recognition, but it still can not solve the problem of false recognition. If raspberry pie performs well, you can use face_recognition for face detection, under the scheme of multithreading + frame extraction + pixel reduction, can meet the fluency of video, but the Caton is more obvious in face recognition.
Complete code and achievement display
- The storage path of the photos (folders) of the user's face and the storage path of the xml model are configured in the config module.
- The code function in Init module is to read the photo of the user's face and encode it.
- Note: the photos of the user's face only support jpg format. If necessary, you can modify the code in Init module.
import multiprocessing as mp
import cv2
import face_recognition
import os

######################
########config########
######################

face_path="/home/pi/Pictures"  #your_bface_dir
faceCascade = cv2.CascadeClassifier('/home/pi/haarcascade_frontalface_default.xml')


######################
########Init##########
######################

faces = [] # face  list
names = [] # name  list
flist = os.listdir(face_path)
for fstr in flist:
  s = fstr.split('.')
  if s[len(s)-1]=="jpg":
    face = face_recognition.load_image_file(face_path+"/"+fstr) # load jpg file in face_path
    face_code = face_recognition.face_encodings(face)[0]#get face code
    face_name = s[0]#get face name
    faces.append(face_code)#put into faces
    names.append(face_name)#put into names


#check the exist and location of the face by harr
#def get_faces(frame):
 #   gray = cv2.cvtColor(frame, cv2.COLOR_BGR2GRAY)
  #  faces = faceCascade.detectMultiScale(gray)
   # return faces, frame


#check the exist and location of the face by face_recognition
def get_faces(frame):

    faces = face_recognition.face_locations(frame)
    return faces, frame

#sign the face location in the image
def sign_faces(img,faces,name):
    if(len(faces)==1):
      for (x,y,w,h) in faces:
        #cv2.rectangle(img, (x,y),(x+w,y+h),(255,0,0),2)   # harr uses this
        cv2.rectangle(img, (y,x),(h,w),(255,0,0),2)#face_recognition this line is used for face detection
        if(name!="not a face"):
          # cv2.putText(img,name,(x,y),cv2.FONT_HERSHEY_SIMPLEX,0.5,(0,0,255),2)  # harr uses this line
           cv2.putText(img,name,(y,x),cv2.FONT_HERSHEY_SIMPLEX,0.5,(0,0,255),2)#face_recognition this line is used for face detection
        else:
            name = "not a face"
    cv2.imshow("frame",img)
    cv2.waitKey(1)

#detect face and recognition
def face_recog(frame):

   name = "not a face"
   #encoding
   frame_codes = face_recognition.face_encodings(frame)#encoding frame
   # if frmae not face ,skip
   if(len(frame_codes)>0):
     uface_code = frame_codes[0]#get uface code
     name = "unkonw"
     result = face_recognition.compare_faces(faces,uface_code,tolerance=0.45)
     for index,i in enumerate(result):
       if i:
         name = names[index]
         break
     #show face_location and recognition_result
   return name


# main function

if __name__ == "__main__":
    global name
    name = "not a face"
    pool = mp.Pool(processes=4)
    i = 0
    r = [None] * 4
    facesList = [None] * 4
    frame = [None] * 4
    imageList = [None] * 16

    cap = cv2.VideoCapture(0)
    #decrease its scale
    cap.set(3,320)
    cap.set(4,240)

    #assignment the process first
    ret,frame[0] = cap.read()
    r[0] = pool.apply_async(get_faces,[frame[0]])
    ret,frame[1] = cap.read()
    r[1] = pool.apply_async(get_faces,[frame[1]])
    ret,frame[2] = cap.read()
    r[2] = pool.apply_async(get_faces,[frame[2]])
    ret,frame[3] = cap.read()
    r[3] = pool.apply_async(get_faces,[frame[3]])

    facesList[0],imageList[0] = r[0].get()
    facesList[1],imageList[4] = r[1].get()
    facesList[2],imageList[8] = r[2].get()
    facesList[3],imageList[12] = r[3].get()

    for j in range(4):
        imageList[4*j+1] = imageList[j]
        imageList[4*j+2] = imageList[j]
        imageList[4*j+3] = imageList[j]

    while(1):
        #whether to quit
        if cv2.waitKey(1) & 0xFF == ord('q'):
            #cv2.imwrite("camera.jpg",frame) #write image to file
            break


        if(i==0):
            ret,frame[0] = cap.read()
            r[0] = pool.apply_async(get_faces,[frame[0]])
            sign_faces(imageList[i+1],facesList[0],name)
        elif(i==1):
            ret,frame[0] = cap.read()
            imageList[i] = frame[0]
            sign_faces(imageList[i+1],facesList[0],name)
        elif(i==2):
            ret,frame[0] = cap.read()
            imageList[i] = frame[0]
            sign_faces(imageList[i+1],facesList[0],name)

        elif(i==3):
            ret,frame[1] = cap.read()
            imageList[i] = frame[1]
            facesList[1],imageList[i+1] = r[1].get()
            sign_faces(imageList[i+1],facesList[1],name)
        elif(i==4):
            ret,frame[1] = cap.read()
            r[1] = pool.apply_async(get_faces,[frame[1]],)
            sign_faces(imageList[i+1],facesList[1],name)
        elif(i==5):
            ret,frame[1] = cap.read()
            imageList[i] = frame[1]
            sign_faces(imageList[i+1],facesList[1],name)
        elif(i==6):
            ret,frame[1] = cap.read()
            imageList[i] = frame[1]
            sign_faces(imageList[i+1],facesList[1],name)

        elif(i==7):
            ret,frame[2] = cap.read()
            imageList[i] = frame[2]
            facesList[2],imageList[i+1] = r[2].get()
            sign_faces(imageList[i+1],facesList[2],name)
        elif(i==8):
            ret,frame[2] = cap.read()
            r[2] = pool.apply_async(get_faces,[frame[2]])
            sign_faces(imageList[i+1],facesList[2],name)
        elif(i==9):
            ret,frame[2] = cap.read()
            imageList[i] = frame[2]
            sign_faces(imageList[i+1],facesList[2],name)
        elif(i==10):
            ret,frame[2] = cap.read()
            imageList[i] = frame[2]
            sign_faces(imageList[i+1],facesList[2],name)

        elif(i==11):
            ret,frame[3] = cap.read()
            imageList[i] = frame[3]
            facesList[3],imageList[i+1] = r[3].get()
            sign_faces(imageList[i+1],facesList[3],name)
        elif(i==12):
            ret,frame[3] = cap.read()
            r[3] = pool.apply_async(get_faces,[frame[3]])
            sign_faces(imageList[i+1],facesList[3],name)
        elif(i==13):
            ret,frame[3] = cap.read()
            imageList[i] = frame[3]
            sign_faces(imageList[i+1],facesList[3],name)
        elif(i==14):
            ret,frame[3] = cap.read()
            imageList[i] = frame[3]
            sign_faces(imageList[i+1],facesList[3],name)

        elif(i==15):
            ret,frame[0] = cap.read()
            imageList[i] = frame[0]
            facesList[0],imageList[0] = r[0].get()
            if(name=="not a face"):
                if(len(facesList[0])==1):
                    name = face_recog(imageList[0])
            else:
                if(len(facesList[0])!=1):
                    name = "not a face"
            sign_faces(imageList[0],facesList[0],name)
            i = -1

        i += 1


    cap.release()
    cv2.destroyAllWindows()
Result display:
zxPi (raspberrypi) - VNC Viewer 2021-06-14 00-09-33