·For related learning of CornerNet, please refer to my other articles~
This article is more detailed. Zero basic Xiaobai can also run out of the program through this article. The author is just getting started. If there are deficiencies, please point out more!
1, Foreword
1. Relevant references
The key to this tutorial is to refer to it. It is well written. You can see: Turing studio Ling: running CornerNet tutorial with pytorch under Windows
Thesis source code and tutorial: https://github.com/princeton-vl/CornerNet-Lite
2. Environment
Windows 10, 64 bit
CPU: i7-7700HQ, 4G video memory
Memory module: 8G
NVIDIA GPU driver: Cuda 10.1
Virtual environment created under Anaconda 3: python 3.7, torch 1 7.0,torchvision0.8.1,torchaudio0. seven
3. Attention
Because everyone's environment is different, running the program according to the method in this article will still encounter some small problems, such as missing plug-ins and reporting errors, which requires you to check your installation on the Internet, but these are very simple, and the big pit has been solved in this article.
2, Environmental installation
1. Install CUDA
Download NVIDIA GPU driver CUDA 10.1 here: https://developer.nvidia.com/cuda-10.1-download-archive-update2?target_os=Windows&target_arch=x86_64&target_version=10&target_type=exelocal
If you want to download other versions of CUDA, you can find it here: https://developer.nvidia.com/cuda-toolkit-archive
Just install disk C by default.
Then add to the environment variable in the following CUDA path:
< your folder > \ NVIDIA GPU computing toolkit \ CUDA \ v10 1\bin
(don't know how to add environment variables? Right click my computer → properties → advanced system settings → environment variables → system variables - Path → edit and add the Path above to it)
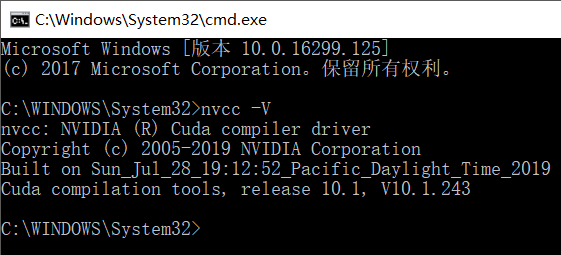
Next, enter nvcc -V in cmd to verify cuda version,
nvcc -V
The successful installation is shown in the figure below:
(as for the matching of CUDA with GPU and torch packages? Whatever, it's over when the violent device can run!)
2. Anaconda virtual environment
It is recommended to use Anaconda3 to build the environment in which the code runs
It is strongly recommended to read this article: [Anaconda tutorial 01] how to install Anaconda 3
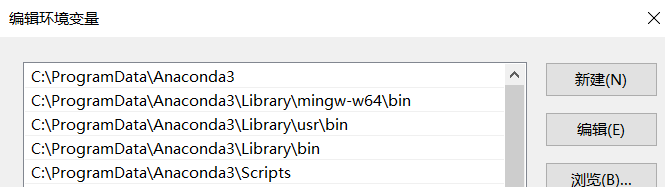
Note that after installing Anaconda3, configure the environment variables (if not, refer to the above):
Then open Anaconda Prompt, enter instructions and create a virtual environment (it is recommended to run as an administrator):
conda create -n environment_name python=3.7
 //(Note: "environment_name" is the name of the environment to be created, which can be defined by yourself; "python=X.X" is the selected Python version)
If the download speed is very slow, you can enter the following instructions to add Tsinghua source:
conda config --add channels https://mirrors.tuna.tsinghua.edu.cn/anaconda/pkgs/free/
conda config --add channels https://mirrors.tuna.tsinghua.edu.cn/anaconda/pkgs/main/
Enter this environment (activate environment):
//Every time you want to run code in this environment, you need to activate it
activate environment_name
3. Install PyTorch package
It is strongly recommended to install PyTorch related packages offline.
First go to this website to download PyTorch file: https://download.pytorch.org/whl/torch_stable.html
Download torch 1 7.0,torchvision0.8.1,torchaudio0. Just 7.0 (windows). Note that python 3.7 is used here, so cp37 needs to be selected.
Then, in the environment, install the three PyTorch packages in sequence:
pip install <.whl File path>\torch file name.whl
pip install <.whl File path>\torchvision file name.whl
pip install <.whl File path>\torchaudio file name.whl
4. Install C + + editor VS
Install Microsoft Visual Studio 2019 (download from the Internet)
After installation, add the path of cl.exe (Microsoft C/C + + compiler) to the environment variable. (no, see above)
Note that there will be multiple cl.exe compilers in the downloaded VS2019 folder. You should choose one that matches your own machine. For example, my path is:
D:\Microsoft Visual Studio\2019\Community\VC\Tools\MSVC\14.28.29910\bin\Hostx64\x64
3, Testing
1. Install minGW
Install minGW for make under windows
Download MinGW get setup exe: https://sourceforge.net/projects/mingw/files/latest/download?source=files
Randomly install to a folder and check all. Then you will enter the installation package interface:

Click all packages on the left, select mingw32-gcc-g + + and mingw32 make, and the class is bin. (of course, you can also check all)
Then click Installation → Apply Changes → Apply in the upper left corner
After completion, you will the mingw32-make in < your installation path > \ MinGW \ bin path Rename exe to make.exe exe
Then add the above path to the environment variable. (no, see above)
2. Modify the source code
The modified code refers to the article of the boss: Turing studio Ling: running CornerNet tutorial with pytorch under Windows
- Go to < your program folder > \ cornernet Lite master \ core \ models \ PY_ utils/_ Cpools \ SRC, the first line of four C + + codes
#include <torch/torch.h>
Change to:
#include <torch/extension.h>
- Go to < your program folder > \ cornernet Lite master \ core \ external and set up In the PY code, the following lines (2) are commented out:
#Comment me out
#extra_compile_args=["-Wno-cpp", "-Wno-unused-function"]
3. Download model weight
Download the weight files of the three models below (just download the model you want to use, and it is recommended to download it scientifically on the Internet):
CornerNet weight: https://drive.google.com/file/d/1e8At_iZWyXQgLlMwHkB83kN-AN85Uff1/view
Cornernet saccade weight: https://drive.google.com/file/d/1MQDyPRI0HgDHxHToudHqQ-2m8TVBciaa/view
Cornernet squeeze weight: https://drive.google.com/file/d/1qM8BBYCLUBcZx_UmLT0qMXNTh-Yshp4X/view
Enter < your program folder > \ cornernet Lite master \ cache \ NNET path (if not, create it yourself)
Create three folders: cornernet and CornerNet_Saccade,CornerNet_Squeeze.
Download the above The pkl weight file is placed in the corresponding folder.
4. Compile dependent functions
1. Enter the instruction to jump to the directory and run the python program to compile corner pooling:
cd <Your program folder>\CornerNet-Lite-master\core\models\py_utils\_cpools\
python setup.py install --user
2. Input the instruction to jump to the directory and compile the non maximum suppression with the make instruction:
cd <Your program folder>\CornerNet-Lite-master\core\external
make
After the above is completed, there is no need to compile again in the future.
5. Start the test
Run the test program demo Py, read demo Jpg (source code has default), output the forecast result demo_out.jpg:
cd <Your program folder>\CornerNet-Lite-master
python demo.py --user
demo.jpg can be changed by yourself. Note that the picture is too large for the computer to carry, and the format must be jpg.
The default prediction model of the code is cornernet saccade, which can be changed by yourself.
My own test code is as follows. Because the computer performance is limited, I write image clipping and output the prediction results of three networks. You can use it:
demo.py:
import cv2
from core.detectors import CornerNet_Saccade
from core.detectors import CornerNet_Squeeze
from core.detectors import CornerNet
from core.vis_utils import draw_bboxes
import time #I added it myself
image0    = cv2.imread("demo.jpg")#It should be three-dimensional

###Not enough video memory, reduce the picture
max_len = 2048  #Up to 2048 pixels wide
if max(image0.shape) > max_len:
    ratio = max_len/max(image0.shape)
    image0 = cv2.resize(image0, (int(image0.shape[1]*ratio), int(image0.shape[0]*ratio)))
###

t=time.strftime("%Y-%m-%d_%H-%M-%S", time.localtime())
t=str(t)
cv2.imwrite("%sInput.jpg"%t, image0)
print(image0.shape)

start =time.clock() #####time

detector = CornerNet_Saccade()   #detector = CornerNet_Squeeze()  #detector = CornerNet()
bboxes = detector(image0)
image  = draw_bboxes(image0, bboxes)
cv2.imwrite("%sOut_Saccade.jpg"%t, image)
end = time.clock()
print('CornerNet_Saccade Running time: %s Seconds'%(end-start))###############time

start =time.clock() #####time
######################################
detector = CornerNet_Squeeze()
bboxes = detector(image0)
image  = draw_bboxes(image0, bboxes)
cv2.imwrite("%sOut_Squeeze.jpg"%t, image)
end = time.clock()
print('CornerNet_Squeeze Running time: %s Seconds'%(end-start))###############time

###Not enough video memory, reduce the picture
max_len = 1024  #1024 pixels wide at most
if max(image0.shape) > max_len:
    ratio = max_len/max(image0.shape)
    image0 = cv2.resize(image0, (int(image0.shape[1]*ratio), int(image0.shape[0]*ratio)))
###

start =time.clock() #####time
detector = CornerNet()
bboxes = detector(image0)
image  = draw_bboxes(image0, bboxes)
cv2.imwrite("%sOut_CornerNet.jpg"%t, image)
end = time.clock()
print('CornerNet_Cornernet Running time: %s Seconds'%(end-start))###############time
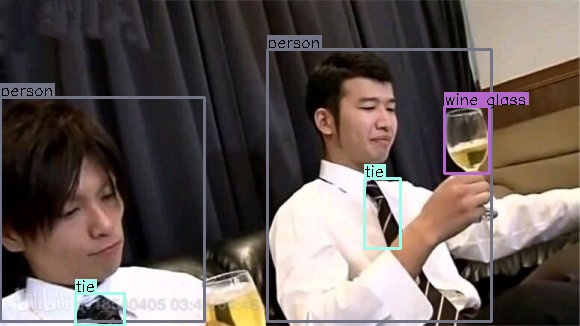
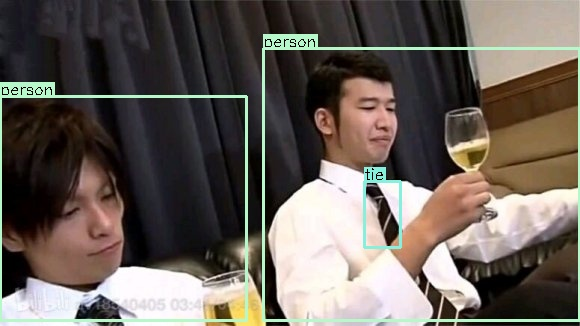
Here is the result of the output of your own image (laughter)
CornerNet:
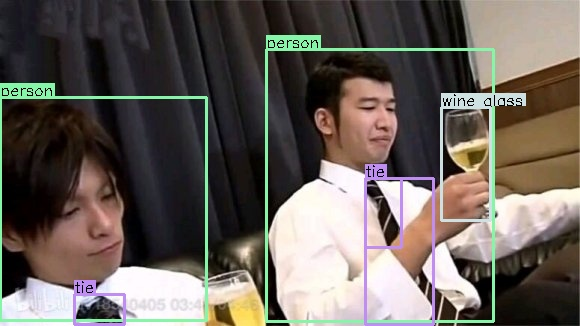
CornerNet_Saccade:
CornerNet_Squeeze:
4, Training
1. Download data set
Go to coco's official website to download training set 2014 Train images, validation set 2014 Val images, test set 2017 Train images, and annotation file 2014 Train/Val annotations: https://cocodataset.org/#download (it is recommended to download it online)
Create three folders under < your program folder > \ cornernet Lite master \ data \ coco \ images \:
trainval2014, minival2014 , testdev2017
Put the images in the image data set compression package in the above folder. (if you don't have one, you can create it yourself. If you put the above three folders in, it will be a pile of pictures directly)
Unzip the label file and compress three of them json files are placed in:
< your program folder > \ cornernet Lite master \ data \ coco \ annotations (if not, create it yourself)
2. Install cocoAPI
Download the cocoAPI package: https://github.com/cocodataset/cocoapi
Unzip to: < your program folder > \ cornernet Lite master \ data \ coco
Then modify the setup. XML file in the python API folder Py code, comment the following statement:
#Comment me out
#extra_compile_args=['-Wno-cpp', '-Wno-unused-function', '-std=c99'],
Then jump to this folder and enter the instruction to install cocoAPI:
cd <Your program folder>\CornerNet-Lite-master\data\coco\PythonAPI
python setup.py build_ext --inplace
python setup.py build_ext install
If an error is reported and the installation fails, installing cython can solve the following problems:
pip3 install cython
3. Modify model training preset
You can modify the corresponding model training configuration file under < your program folder > \ cornernet Lite master \ configs.
"batch_size" refers to the batch size. If the computer performance is not enough, it can be set smaller;
"chunk_sizes" refers to the number of pictures processed on each GPU, and its sum is equal to the batch size. Generally, we set it to have only one element. (because we only use one GPU in the later training)
4. Start training
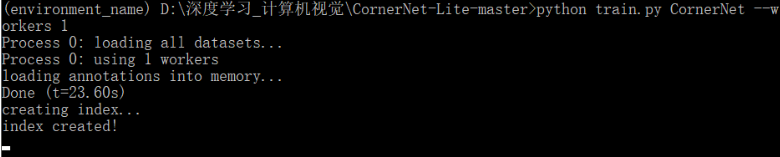
Run the training program train Py, training model:
cd <Your program folder>\CornerNet-Lite-master

#Train the CornerNet network (using 1 GPU)
python train.py CornerNet --workers 1
#Or train CornerNett_Squeeze network
python train.py CornerNett_Squeeze --workers 1
#Or train CornerNett_Saccade network
python train.py CornerNett_Saccade --workers 1
My training results:
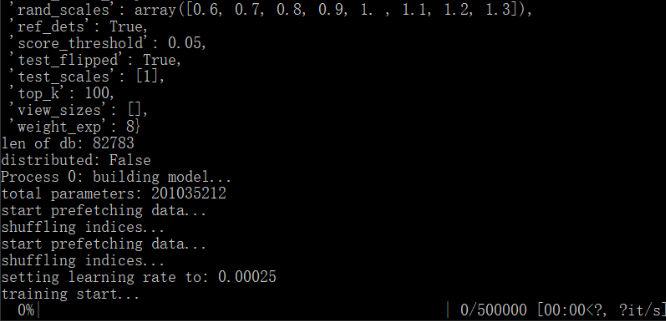
Unfortunately, my graphics card is too bad (SAD):

5, Write it at the back
This is the first CV project I studied (thank my tutor for recommending it to me). I also started from Xiaobai step by step. After learning a lot of big guys' articles, I solved the problems encountered and got this article. I hope it can help you.
The experience is that the process of running the source code must be tortuous. For example, the most common problem we encounter in the process of installing plug-ins is the lack of their own code.
The key to running through the source code is to check. In case of an error, debug yourself and check online! I came here step by step. It's over! (no mercy)
Finally, the author has just started, and hermeneutics is the last study. If there are deficiencies, I hope to discuss with you!