1, Basic concepts
The so-called monkey test (Money Test), also known as funny test and strange use test, refers to that in software testing, testers can carry out various strange operation modes to test the stability of software. Monkey test, generally speaking, is a test method for the robustness of the system to the input of signal factors. It is generally used in systems requiring high logical tightness such as computer software programs.
Monkey testing is widely used in software BUG testing because of the "repeatability" of the system and the "limitation" and "simplicity" of the system input factors.
Often, complex tests find more bug s than simple tests. But most automated tests are simple. We expect an output after an input, and then the program returns to a known basic state, and then we perform another simple test. We generally design test cases in a certain logical order and after careful consideration, but such tests are still simple tests. When we return to the basic state of the program, we discard the "history" of the previous test. Real users don't do this. They string a series of simple actions to form a complex action flow.
Our simple tests do not simulate those user behaviors. Therefore, if a simple action causes the failure of another action, our simple test will not find the bug... Therefore, we need to use complex sequences of tests that have not been used before. Monkeys are more effective than people in this regard.
Monkey testing is to make things difficult, press it indiscriminately, and the system can not go down or data errors. In this way, it can be called a program that can stand the test.
2, Advantages and disadvantages of monkey test
2.1 advantages
It is easy to use, convenient and fast, and theoretically all bug s can be tested, because theoretically, as long as the number of times is the most, all events will occur.
2.2 disadvantages
-
The traversal interface is limited. In the monkey test, due to the randomness of events, monkey is easy to get stuck on some simple pages, such as the login page, which has little operational content. Resulting in poor test results. The effectiveness of the test is greatly reduced.
-
Unable to know the steps to reproduce the Bug. Due to the randomness of Monkey, if a Bug is generated due to a specific sequence of events, it is often difficult to reproduce a Bug.
-
Path loopback. Because monkey is too random and can't be controlled at last, it's easy to get stuck in a page or in an insignificant place, resulting in the test results not having good significance. This is also the reason for the limited traversal interface.
2.3 solutions
2.3. 1 secondary development
The secondary development of monkey, such as maxin, can be controlled through some black-and-white lists, or input the specified event flow, or specify different test random patterns, depth first or control identification. At the same time, some fuse mechanisms are added to automatically trigger the fuse and pull it up after too many times in one place. However, this will still enter an endless loop, because it still can not solve the problem of path loopback.
2.3. 2 specify test page
We can specify which pages to test, but we find that if we specify several activities, although we will not fall into the path loop, the significance of randomness is not so great. If we carry out randomness on several pages and the page depth is not very deep, it is meaningless to test on these pages all the time
2.3. 3 adjust the proportion of various events
We can appropriately adjust the proportion of various events according to the characteristics of the application. adb also provides such command parameters.
--pct-trackball <percent>

Function: adjust the percentage of rolling ball events. (the rolling ball event consists of one or more random moving events, sometimes accompanied by clicking events) such as irregular sliding unlocking

--pct-nav<percent> Navigation. Now the mobile phone basically has no navigation

---pct-syskeys<percent> Key message ratio, home, back, volume increase or decrease

--pct-anyevent<percent> The setting of other uncommon key ratios is not commonly used
2.3. 3. Write custom test script
The reason for the above problems in Monkey test is that it is too random. Therefore, if we reduce or even suppress this randomness, we can avoid the above problems. Although adjusting the proportion of various events reduces the randomness, the above problems may still exist. For this reason, we can write specific scripts to let events occur according to the sequence we set, so as to solve the above problems: because we can set the sequence of events, we can naturally reach pages of any depth and locate bugs.
However, this method only applies if we have a clear idea, especially if we want to test some functions in the APP.
2.3. 4 analyze APP characteristics and select appropriate scheme
It can be seen that it is difficult to have both the randomness of the test and the solution of the above problems. We must choose the appropriate scheme according to the characteristics of our application.
For applications with few page functions and simple controls, we can use custom scripts for testing, because it is also possible to test all functions in this case.
For applications with regular page structure, such as live broadcasting software, the structure of each page is relatively fixed (the length of the live broadcasting room is the same), or e-commerce app (the pages of each commodity are roughly the same). Due to randomness, clicking will not always be in the same place, so it is not easy to get stuck on the same page all the time.
3, Basic process of monkey test
3.1 environmental preparation
3.1. 1 environment
- Computer system: Windows 10
- Mobile system: Android 10
- JDK version: 1.8
- SDK version: 1.0.0 forty-one
3.1. 2 configuration process
Every android phone has a Monkey tool, but we can't see it, because Monkey is not a visual tool. We need ADB to communicate with Monkey.
ADB's full name is Android Debug Bridge, which is a bridge between computer devices and mobile phones. Before we start Monkey testing, we need to build an environment. The first prerequisite is to install the Java JDK, and the second prerequisite is to install the android SDK.
- Download jdk. Refer to the following for the specific installation process: https://blog.csdn.net/write6/article/details/79136388
- Then download the sdk. For the specific installation process, refer to: https://blog.csdn.net/u011541946/article/details/77142045
After successful configuration, open cmd and enter the following command:
adb
The following screen appears:
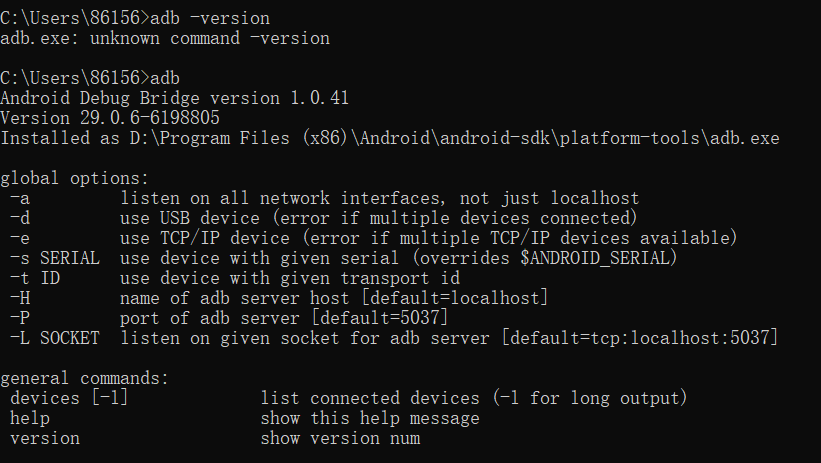
Indicates that the configuration was successful.
3.2 test adb procedure
3.2. 1 connecting equipment
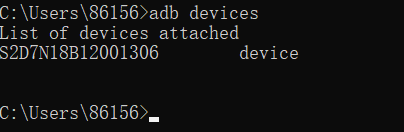
After the configuration is successful, open the developer mode of the mobile phone, then open USB debugging, connect the mobile phone and computer with the data cable, and then enter the following command in cmd
adb devices
The following screen appears, indicating that the connection is successful
3.2. 2 get package name
Method 1:
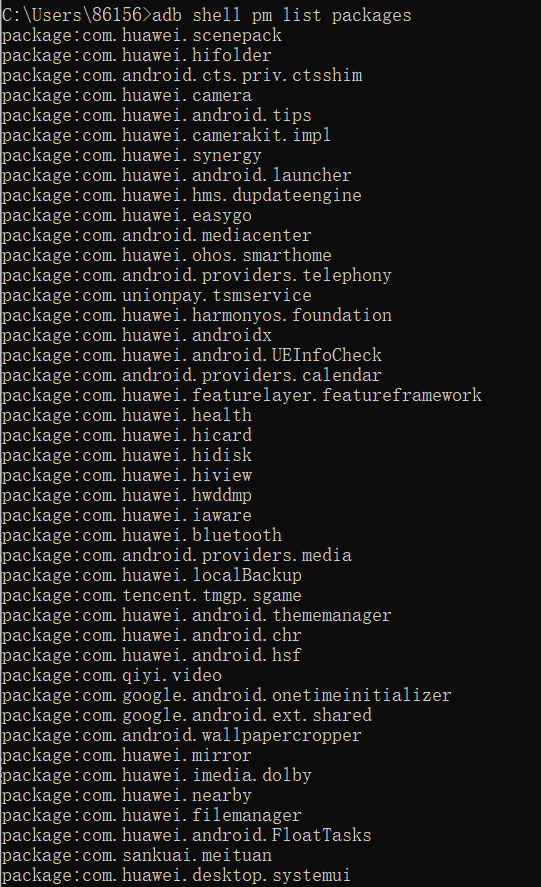
Enter the following command in cmd
adb shell pm list packages
You can view all the installation packages of the mobile phone (only some are shown below). You can find the package you want to evaluate by name
Method 2
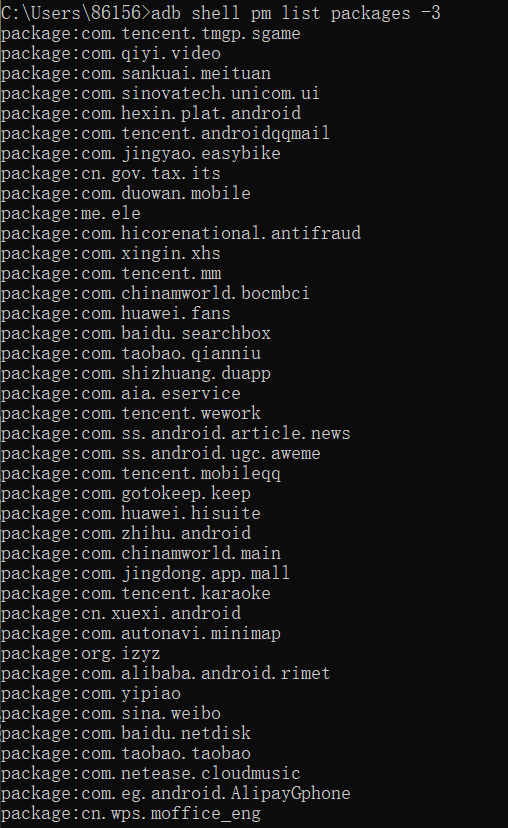
input
adb shell pm list packages -3
You can view all the third-party installation packages on the mobile phone, and find the package you want to evaluate by name
Method 3
Enter command
adb shell logcat|findstr "Displayed
At the same time, open the APP to be tested and the following screen will appear. Take today's headlines as an example

Including com ss. android. article. News indicates that the package name is followed by APPactivity, which can be used for automated evaluation.
3.2. 3 use monkey test
Test the whole machine
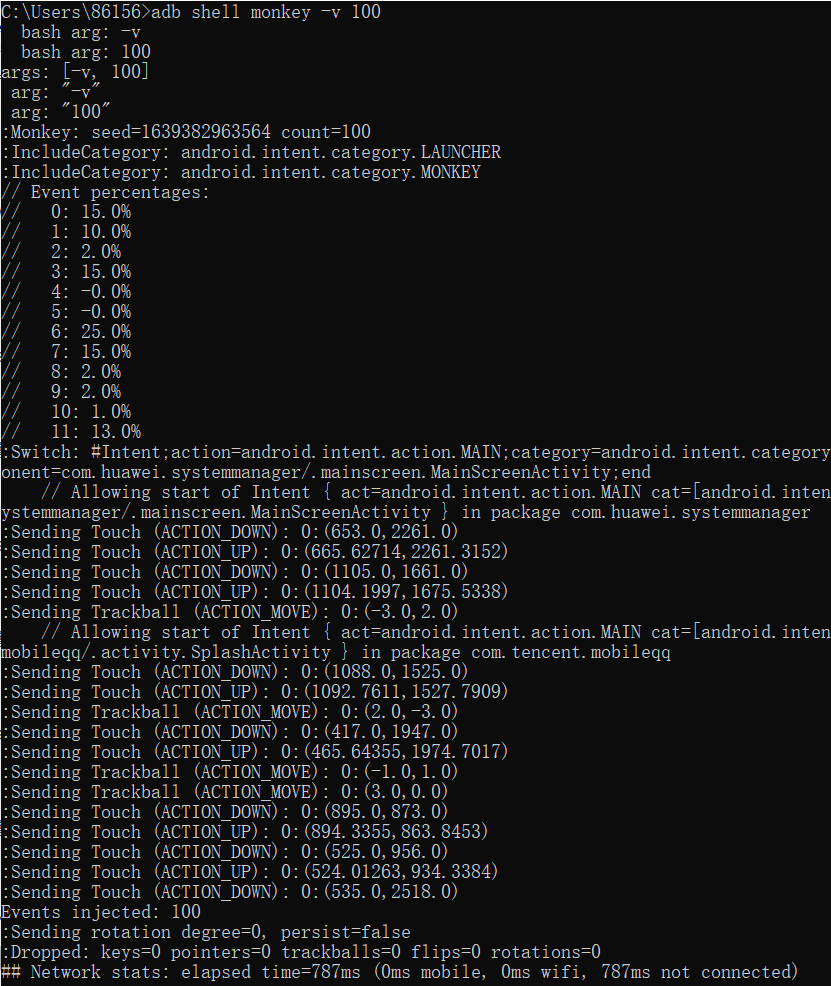
Use adb shell monkey -v 100 to test the whole machine
Test the specified application
Find the package name and use a simple command to perform the monkey test,
adb shell monkey -p com.ss.android.article.news -v -v -v 100
among
-p indicates the program for the specified test
-v means to view the execution log of monkey. The more - v, the more detailed the information.
They correspond to three levels:
Level 0(Default value)
Provide less information than startup tips, test completion, and final results.
Level 1
 Provide more detailed test information, such as sending to Activity Events.
Level 2
 Provide more detailed setting information, such as those selected or unchecked in the test Activity
100 indicates that the number of test events executed is 100
After execution, detailed information will appear. At the same time, it will be found that the mobile App interface has automatically performed 100 random operations.
3.2. 4 log content analysis
The log output by Monkey runtime generally contains four types of information: test command information, pseudo-random event flow information, exception information and Monkey execution result information.
Test command information
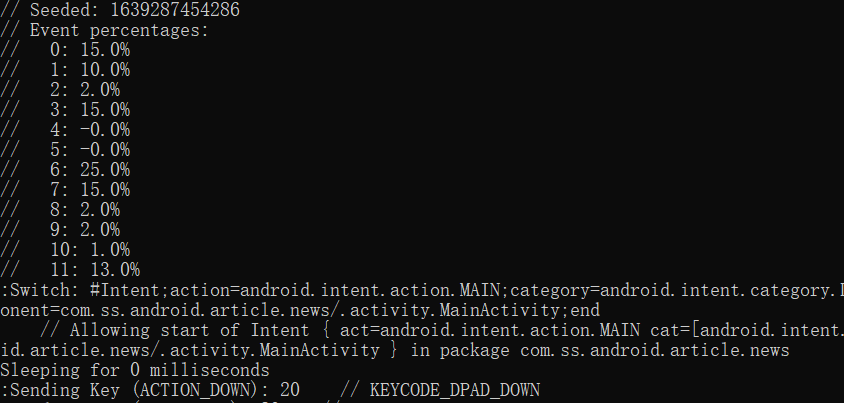
-----Random seed, number of execution events-----
:Monkey: seed=1639214805777 count=100

-----List of runnable applications-----
:AllowPackage: com.ss.android.article.news

-----Indicates the activity started-----
:IncludeCategory: android.intent.category.LAUNCHER
:IncludeCategory: android.intent.category.MONKEY

-----Represents an open activity-----
// Selecting main activities from category android.intent.category.LAUNCHER
// Seeded: 1639214805777

-----Percentage of events-----
// Event percentages:
//   0: 15.0%
//   1: 10.0%
//   2: 2.0%
//   3: 15.0%
//   4: -0.0%
//   5: -0.0%
//   6: 25.0%
//   7: 15.0%
//   8: 2.0%
//   9: 2.0%
//   10: 1.0%
//   11: 13.0%
The log will show the percentage of various operations: its meaning will vary with the Android version. In order to understand its meaning, first use the following command to view the Android version
adb shell getprop ro.build.version.release
My query result is

By reading monkeysourcerrandom. In the corresponding version of money source code Java file, you can see that its Event sequence is
public static final int FACTOR_TOUCH        = 0;
public static final int FACTOR_MOTION       = 1;
public static final int FACTOR_PINCHZOOM    = 2;
public static final int FACTOR_TRACKBALL    = 3;
public static final int FACTOR_ROTATION     = 4;
public static final int FACTOR_NAV          = 5;
public static final int FACTOR_MAJORNAV     = 6;
public static final int FACTOR_SYSOPS       = 7;
public static final int FACTOR_APPSWITCH    = 8;
public static final int FACTOR_FLIP         = 9;
public static final int FACTOR_ANYTHING     = 10;
public static final int FACTORZ_COUNT       = 11;    // should be last+1
So the corresponding event is interpreted as
//   0: 15.0% TOUCH event TOUCH, -- PCT TOUCH
//   1: 10.0% gesture event motion, -- PCT motion
//   2: 2.0% two finger scaling event pinchzoom, -- PCT pinchzoom
//   3: 15.0% trackball event trackback, -- PCT trackball
//   4: - 0.0% screen rotation event rotation, -- PCT rotation
//   5: 25.0% basic navigation events NAV, - PCT nav
//   6: 15.0% major navigation events majornav, - PCT majornav
//   7: 2.0% system button events Sysops, -- PCT syskeys
//   8: 2.0% start the activity event appswitch, -- PCT appswitch
//   9: 1.0% keyboard flick event flip, -- PCT flip
//   10: 13.0% other events, including keys and infrequent keys, - PCT anyevent
Pseudo random time flow information
After Monkey starts executing the test, it will output the executed event flow information in sequence.
-----Jump to com.android.article.news Inside activity.MainActivity This activity-----
:Switch: #Intent;action=android.intent.action.MAIN;category=android.intent.category.LAUNCHER;launchFlags=0x10200000;component=com.ss.android.article.news/.activity.MainActivity;end

-----Allow start com.android.article.news Inside activity.MainActivity This activity-----
    // Allowing start of Intent { act=android.intent.action.MAIN cat=[android.intent.category.LAUNCHER] cmp=com.ss.android.article.news/.activity.MainActivity } in package com.ss.android.article.news

-----delay(You can set the delay in the command parameters)-----
Sleeping for 0 milliseconds

-----Touch event-----
:Sending Touch (ACTION_DOWN): 0:(842.0,1801.0)

-----Basic navigation events-----
C:\Users\86156>adb shell monkey -p com.ss.android.article.news -v -v -v 100
Abnormal information
When an error is encountered during Monkey execution, the corresponding exception information will be output. Because the software of this experiment did not encounter errors, there was no output information.
Execution result information
-----100 events were generated-----Events injected: 100-----Indicates screen rotation information-----:Sending rotation degree=0, persist=false-----Indicates discarded event information-----:Dropped: keys=1 pointers=0 trackballs=0 flips=0 rotations=0-----Network status-----## Network stats: elapsed time=700ms (0ms mobile, 0ms wifi, 700ms not connected) -- final execution result ----- / / Monkey finished
3.3 script automation test
3.2 implements the process of random testing using monkey, but sometimes we need to test according to our needs. At this time, we need to design specific test samples.
monkey provides a series of script commands to facilitate us to design test samples according to requirements, mainly including
LaunchActivity(pkg_name, cl_name): Start application, first parameter DispatchPress(keycode): Send a fixed key event to the system; for example home Key, back Key; The parameter is the key value, which can be viewed keycodeUserWait: Pause the execution of the script for a period of time and do a wait operation RotateScreen(rotationDegree, persist): Flip the screen. The first parameter is the rotation angle, and the second parameter is whether to stop at the current position after rotation Tap(x, y) : Click the event, click the screen, and the parameter is click coordinates Drag(xStart, yStart, xEnd, yEnd) : Sliding on the screen, the coordinates slide from which point to which point DispatchString(input): Input string RunCmd(cmd) : implement shell Commands, such as screenshots screencap -p /data/local/tmp/tmp.pngDispatchFlip(true/false) : Turn the soft keyboard on or off UserWait(sleepTime) : Sleep specified time
3.3. 1 demand analysis
The following test cases are mainly realized in this experiment:
Open today's headlines, click the search box, enter "abc", and then click search. Play the first video and adjust the volume (increase and decrease) during playback.
It can be seen from the script commands in the data that the input string can use the DispatchString(input) function, but we also need to click the search box and search key, so we need to obtain the coordinates of the corresponding key. Finally, you can use RunCmd(Cmd) to take a screenshot.
3.3. 2 get coordinates
Keep the device connected. Execute the following command to get the current event,
adb shellgetevent
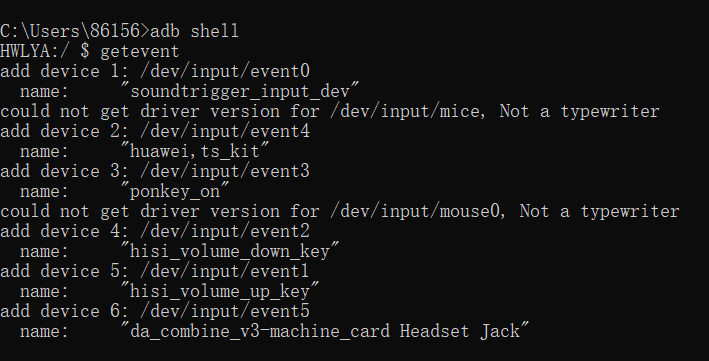
Then click the corresponding area of the screen to see the following information
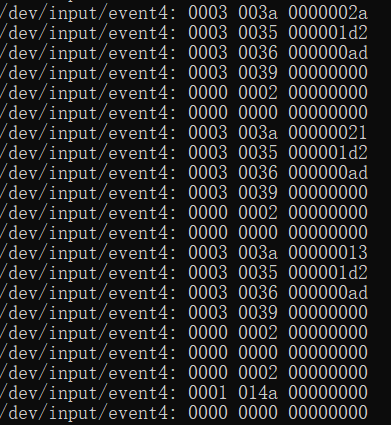
There are four columns of information: equipment name, Code, Type and Value
Code refers to what the event is.
Type refers to the relevant parameters of the event
Value refers to the value of the event parameter.
code value:
0003 - > absolute coordinates
0000 - > synchronization event. Represents the completion of an operation.
0001—>key_broad.
0002 - > relative coordinates.
Type value, we only focus on two values
0035 - > absolute coordinate X
0036 - > absolute coordinate Y
Value: indicates the corresponding value
The coordinates clicked in the example are (0x1d2=466,0xad=173)
3.3. 3 script
Write the following script according to the information obtained by the requirements
# Start of Script type= user count= 10 speed= 1.0 start data >> #open the appLaunchActivity(com.ss.android.article.news, com.ss.android.article.news.activity.MainActivity) UserWait(8000)Tap(576, 239)UserWait(2000) DispatchString(abc)UserWait(2000) Tap(1298, 216)UserWait(2000) Tap(746,1277)UserWait(8000) #turn up and down the volumeDispatchPress(24)UserWait(1000) DispatchPress(24)UserWait(1000) DispatchPress(24)UserWait(1000) DispatchPress(24)UserWait(1000) DispatchPress(24)UserWait(3000) DispatchPress(25)UserWait(1000) DispatchPress(25)UserWait(1000) DispatchPress(25)UserWait(1000)
3.3. 4 execute script
Because Monkey runs on the device, you need to transfer the script to the device first,
Through ADB push monkey txt sdcard/monkey. Txt push the file to the sd card of the mobile phone
Then use ADB shell monkey - F sdcard / monkey Txt - V 1execute script file
The execution log is as follows:
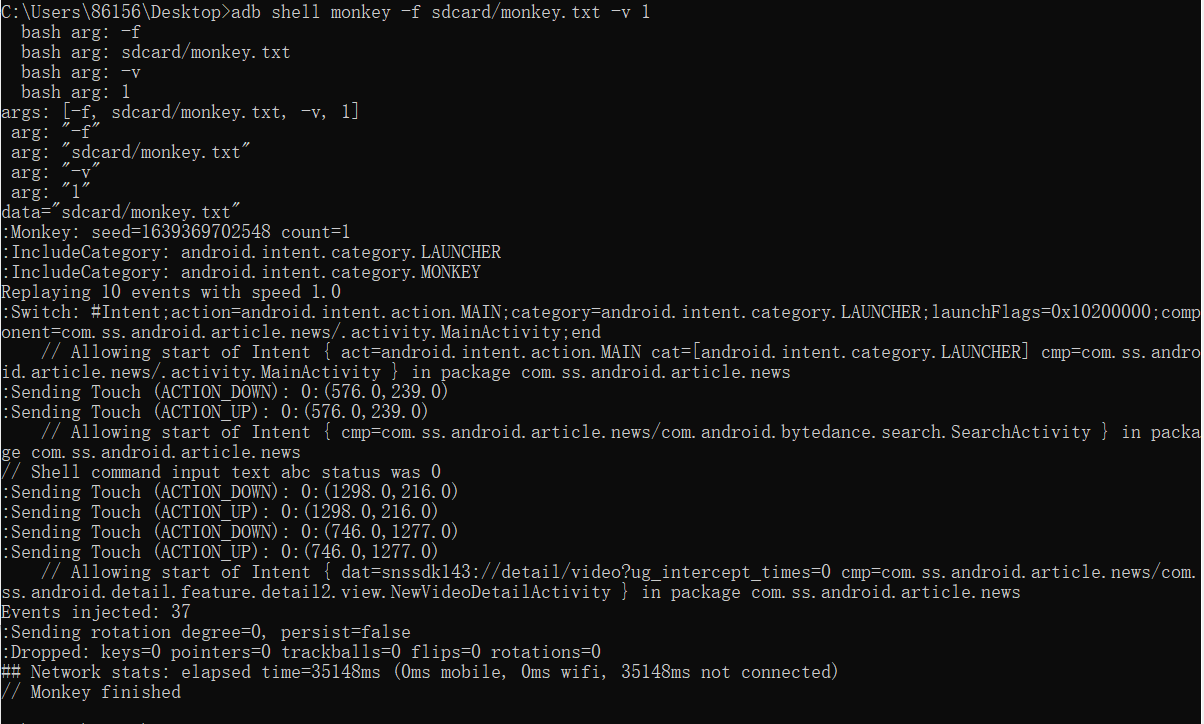
As you can see, each event was successfully executed.