1. Download SSD pytorch code
SSD pytorch code link: https://github.com/amdegroot/ssd.pytorch
git clone https://github.com/amdegroot/ssd.pytorch
- Run the code and download it locally (if the download is too slow, you can upload it to the code cloud, and then git clone the code cloud address)
2. Prepare data sets
- Students without datasets can download the VOC and COCO datasets of the code (. / data/scripts directory)
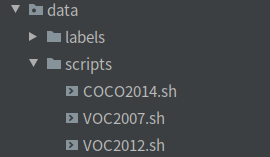
- If you have your own dataset, please place the dataset in the. / data directory, such as VOC format dataset, and create a new VOCdevkit folder, as shown in the figure below. You can refer to: https://blog.csdn.net/qq_34806812/article/details/81673798.
- Place all labels in Annotations, all pictures in JPEGimages, and train.txt/val.txt/test.txt in ImagesSets/Main (the content is only the name of the picture, such as 0000110002, without suffix jpg or png), which can be generated by the script itself: https://blog.csdn.net/GeekYao/article/details/105074574.

3. Modify the code according to your own data set
- For the data set in VOC format used by bloggers, the following modifications take VOC format as an example
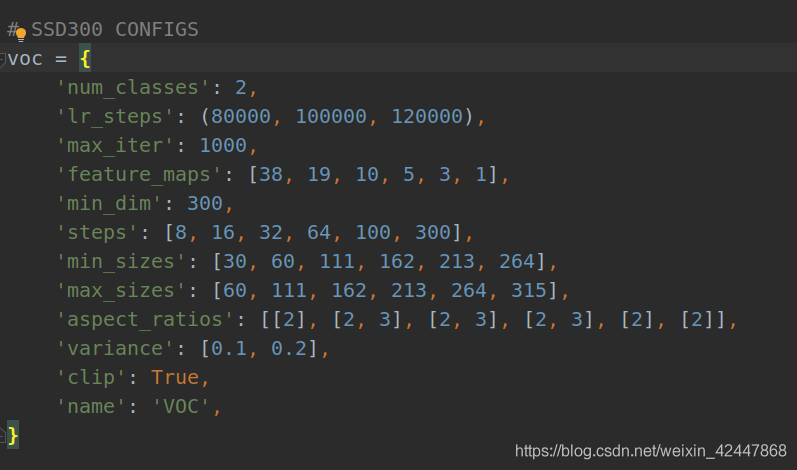
3.1 config.py
-
Locate the config.py file,
-
Open and modify num in VOC_ Classes, modify according to your own situation: classes+1 (background is a class),
-
I have only one category here. All are 2
-
It's best to modify max for the first debugging_ ITER, otherwise, the number of iterations is too large and takes a long time. Other parameters are super parameters that can take up time and not be modified
For the data set in VOC format used by bloggers, the following modifications take VOC format as an example
 3.2VOC0712.py
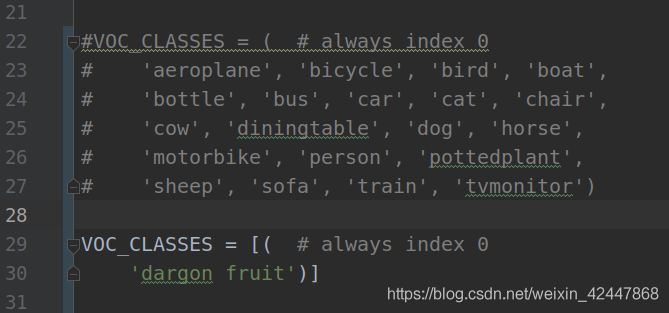
- Modify according to your own label. There is only one type of blogger here, so there is only one dargon fruit (Note: if there is only one type, you need to add [])

- image_ Modify it in sets. Modify it according to your own data set. I only have train and val here
3.3 train.py
 Download the pre training model. VGG16_reducedfc.pth
Link: https://pan.baidu.com/s/1EW9qT0nJkE2dK7thn_kPVw password: nw6t
– sharing from Baidu online disk super member V1

- Modify batch according to your own video memory_ Size, it is suggested to modify it a little smaller at the beginning. Blogger 1660ti 6G video memory
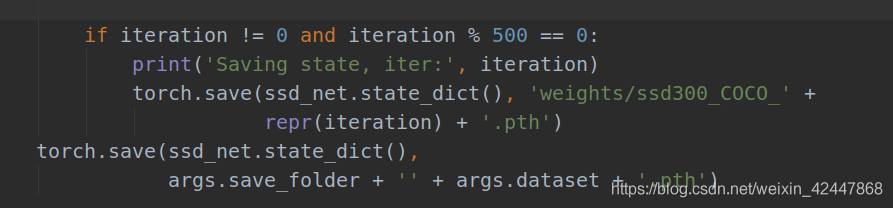
- Lower the parameters of the saved training model to 1000 previously set by iter and 500 here, and then set them according to your own situation
- By the way, the saved model name can also be modified later. Change COCO to VOC. The blogger has not modified it here
3.4 eval.py
 Add the trained model to eval.py to verify the model. I trained ssd300 here_ VOC_ 500.pth
Put the following
args = parser.parse_args()
Change to
args,unknow= parser.parse_known_args()
3.5 SSD.py
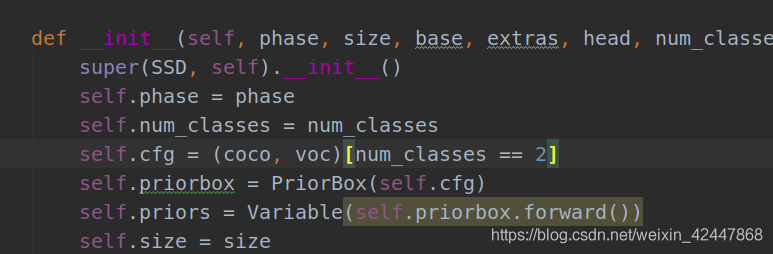
- Modify num_classes, just the same as in config.py above
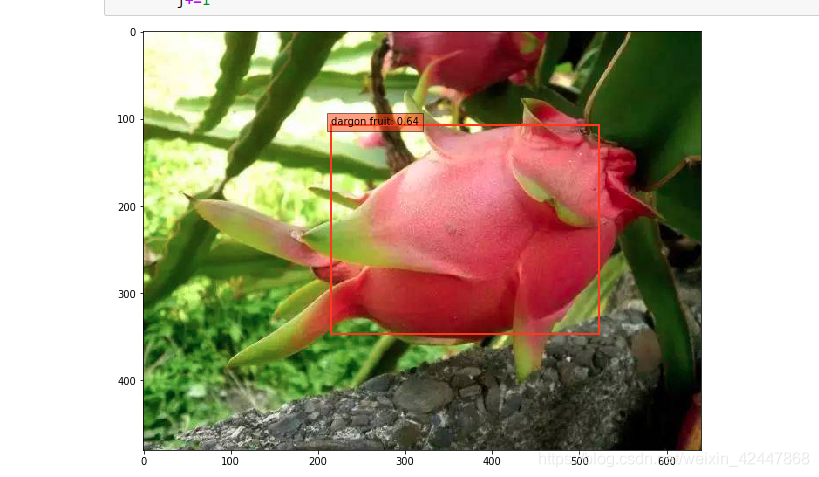
- After the modification, run train.py. After the training, the blogger runs eval.py to verify the training model. The AP is only 63%, which may be because there are too few blogger data sets
Running eval.py can only see the AP value. To test your image, run demo.ipynb in jupyter notebook
Modify the code of the corresponding part to the following, and pay attention to the correct path of adding pictures
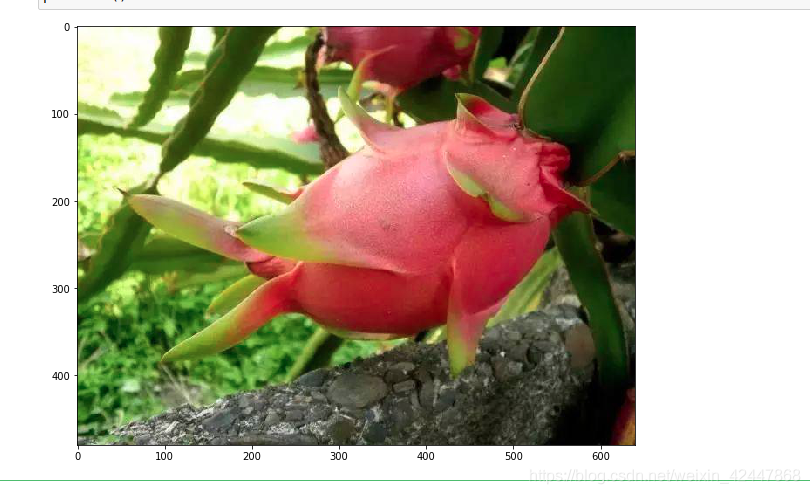
image = cv2.imread('.../data/example3.jpg', cv2.IMREAD_COLOR) # uncomment if dataset not downloaded
from matplotlib import pyplot as plt
from data import VOCDetection, VOC_ROOT, VOCAnnotationTransform
here we specify year (07 or 12) and dataset ('test', 'val', 'train')
#testset = VOCDetection('./data/example1.jpg', [('2020', 'val')], None, VOCAnnotationTransform())
#img_id = 13
#image = testset.pull_image(img_id)
rgb_image = cv2.cvtColor(image, cv2.COLOR_BGR2RGB)
plt.figure(figsize=(10,10))
plt.imshow(rgb_image)
plt.show()
 Possible problems:
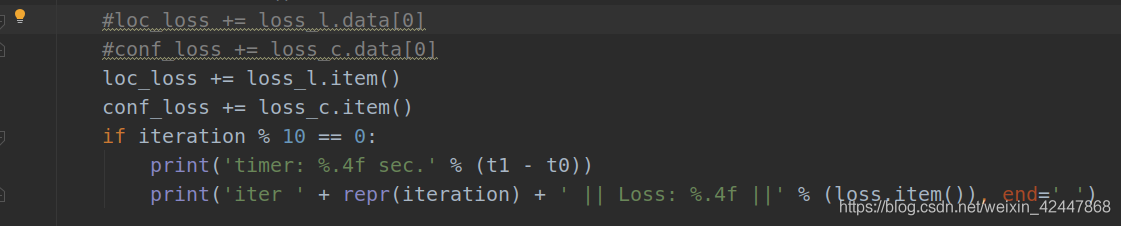
bug1: the dimensions do not match
loc_ loss += loss_ l. Error in data [0]
 resolvent:
- Change. data[0] to. item(), and the in the following print is also changed to loss.item()
- Recommended reference: https://github.com/amdegroot/ssd.pytorch/issues/421
bug2: automatically stop training
resolvent:
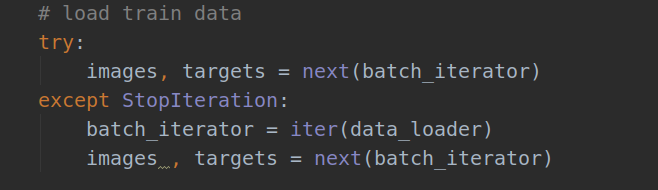
3. The load train data part is modified as shown in the figure above
bug3: the pytorch version may cause problems
Solution: according to the prompt statement, Baidu can modify it
bug4: running eval.py may lead to pytest
Solution: test in eval.py_ Net function name can be modified. The test keyword cannot appear. Bloggers can modify it to set_net runs successfully
bug5: training appears - nan
Solution: reduce learning rate
bug6: insufficient video memory Runtimeout
Solution: reduce batch_size
bug7: there are too many array indexes
IndexError: too many indices for array
Solution: because some labels have no data, there will be array index errors
If there is a lot of data, you can use the following script to find out which tag has the problem (pay attention to modifying your own tag path)
import argparse
import sys
import cv2
import os

import os.path          as osp
import numpy            as np

if sys.version_info[0] == 2:
    import xml.etree.cElementTree as ET
else:
    import xml.etree.ElementTree  as ET


parser    = argparse.ArgumentParser(
            description='Single Shot MultiBox Detector Training With Pytorch')
train_set = parser.add_mutually_exclusive_group()

parser.add_argument('--root', default='data/VOCdevkit/VOC2020' , help='Dataset root directory path')

args = parser.parse_args()

CLASSES = [(  # always index 0
    'dargon fruit')]

annopath = osp.join('%s', 'Annotations', '%s.{}'.format("xml"))
imgpath  = osp.join('%s', 'JPEGImages',  '%s.{}'.format("jpg"))

def vocChecker(image_id, width, height, keep_difficult = False):
    target   = ET.parse(annopath % image_id).getroot()
    res      = []

    for obj in target.iter('object'):

        difficult = int(obj.find('difficult').text) == 1

        if not keep_difficult and difficult:
            continue

        name = obj.find('name').text.lower().strip()
        bbox = obj.find('bndbox')

        pts    = ['xmin', 'ymin', 'xmax', 'ymax']
        bndbox = []

        for i, pt in enumerate(pts):

            cur_pt = int(bbox.find(pt).text) - 1
            # scale height or width
            cur_pt = float(cur_pt) / width if i % 2 == 0 else float(cur_pt) / height

            bndbox.append(cur_pt)

        print(name)
        label_idx =  dict(zip(CLASSES, range(len(CLASSES))))[name]
        bndbox.append(label_idx)
        res += [bndbox]  # [xmin, ymin, xmax, ymax, label_ind]
        # img_id = target.find('filename').text[:-4]
    print(res)
    try :
        print(np.array(res)[:,4])
        print(np.array(res)[:,:4])
    except IndexError:
        print("\nINDEX ERROR HERE !\n")
        exit(0)
    return res  # [[xmin, ymin, xmax, ymax, label_ind], ... ]

if __name__ == '__main__' :

    i = 0

    for name in sorted(os.listdir(osp.join(args.root,'Annotations'))):
    # as we have only one annotations file per image
        i += 1

        img    = cv2.imread(imgpath  % (args.root,name.split('.')[0]))
        height, width, channels = img.shape
        print("path : {}".format(annopath % (args.root,name.split('.')[0])))
        res = vocChecker((args.root, name.split('.')[0]), height, width)
    print("Total of annotations : {}".format(i))
It is not used commercially for learning
ref: https://blog.csdn.net/weixin_42447868/article/details/105675158