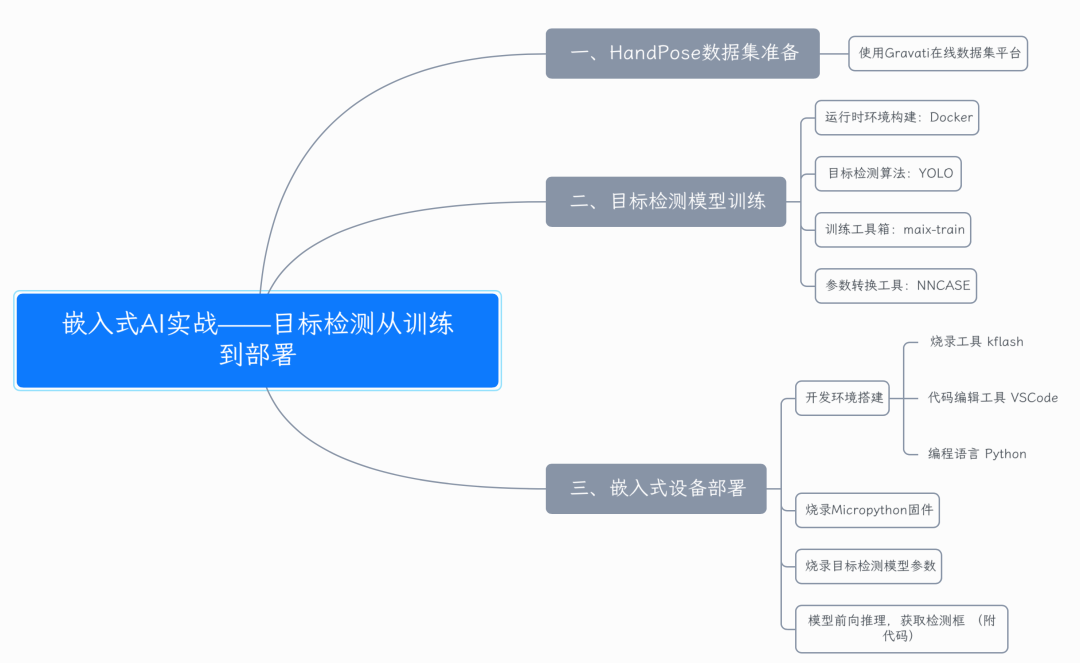
The task of target detection is to find all interested targets (objects) in the image and determine their categories and positions. It is one of the core problems in the field of computer vision. Target detection has been applied to many fields, such as security, unmanned sales, automatic driving and military.
In many cases, the device running the target detection program is not a common computer, but an embedded device containing only necessary peripherals. Although the embedded device is simple, we can still run programs on it to realize our ideas. When designing an embedded AI product, we usually first consider the cost and make full use of the performance of the hardware within the limited cost. Therefore, the hardware usage scenarios of different high and low performance are different.
We talked about how to deploy a basic CNN classification model to recognize numbers. This article goes further and will take you to train a gesture detector and deploy it to embedded devices.
The mind map of this paper is as follows:
Dry goods recommendation
- In depth sorting by the doctoral tutor of Zhejiang University: Tensorflow and pytoch's notes (including the actual combat of classic projects)
- It's worth collecting. This machine learning algorithm data is really fragrant
- It's more delicious than the official documents of PyTorch. Here comes the Chinese version of PyTorch
- Collect it quickly. Here comes the PDF collection of common code snippets of PyTorch
01 dataset preparation
We use an open source dataset platform: https://gas.graviti.com/ , the website summarizes the common public data sets of AI developers. For our specific tasks, we can search the corresponding data sets. It is more convenient to call its SDK for direct online training.
a. Open the data set link corresponding to this article https://gas.graviti.com/dataset/datawhale/HandPoseforK210
b. Register in the upper right corner
c. fork dataset

d. Click Developer Tools at the top of the web page to obtain the AccessKey required to use the SDK. After obtaining the AccessKey, store it in the gas of the project root directory_ key. In py:
KEY = "<Your-Key>"
Then, you can upload, read and use data through the AccessKey, flexibly connect model development and training, and quickly integrate with the data pipeline.
e. After the accessKey is written, the data can be read freely. The caching function can be enabled before reading. After reading data, the SDK will automatically cache it to the specified path. Here, we set the cache path to the data folder.
import numpy as np
from PIL import Image

from tensorbay import GAS
from tensorbay.dataset import Dataset

KEY = 'Copy your ACCESSKEY replace'
def read_gas_image(data):
    with data.open() as fp:
        image = Image.open(fp)
        image.load()
    return np.array(image)

gas = GAS(KEY)
dataset = Dataset("HandPose", gas)
dataset.enable_cache("data")
segments = dataset.keys()
segment = dataset["train"]

for data in segment:
    # Image data in Numpy format obtained
    image = read_gas_image(data)
    # Label data
    for label_box2d in data.label.box2d:
        xmin = label_box2d.xmin
        ymin = label_box2d.ymin
        xmax = label_box2d.xmax
        ymax = label_box2d.ymax
        box2d_category = label_box2d.category
02 target detection model training
There are two methods. The first is to use the local GPU for direct training. If there is no GPU class, use method 2.
Method 1 local GPU training
Step 1: pull the docker image
# Image name
IMAGE="daocloud.io/neucrack/tensorflow-gpu-py3-jupyterlab"
# Pull the deep learning platform image
docker pull $IMAGE
# In the test, gpu=True in the log indicates that the GPU can be used successfully
docker run --gpus all -it --rm $IMAGE python -c "import tensorflow as tf; print('-----version:{}, gpu:{}, 1+2={}'.format(tf.__version__, tf.test.is_gpu_available(), tf.add(1, 2).numpy()) );"
Step 2: pull the code of this article, configure NNCASE, and open the docker container
git clone https://github.com/QiangZiBro/pytorch-k210
cd pytorch-k210/handpose_detection/maix_train
# Configure NNCASE
mkdir -p tools/ncc/ncc_v0.2 && cd tools/ncc/ncc_v0.2
wget https://github.com/kendryte/nncase/releases/download/v0.2.0-beta4/ncc_linux_x86_64.tar.xz
tar xvf ncc-linux-x86_64.tar.xz
cd ../../
The above NNCASE only needs to be downloaded and decompressed. Next, we use Docker to build a Linux virtual container environment, such as the following command to start the environment:
# Open container
docker run --gpus all --name jupyterlab-gpu -it -p 8889:8889 -e USER_NAME=$USER -e USER_ID=`id -u $USER` -e GROUP_NAME=`id -gn $USER` -e GROUP_ID=`id -g $USER` -v `pwd`:/tf $IMAGE
After opening the container, there are two operation modes to choose from
-
First, run using jupyter notebook
-
Second, directly into the container
docker exec -it jupyterlab-gpu /bin/bash
# Inside the container, it is recommended to switch to normal user operation
su - yourname
cd /tf
Here I choose the second way. When creating a container, Docker automatically creates a user with the same user name as the local user name in the image. When running the program in the container, it is strongly recommended to switch to ordinary users, otherwise you need to manually change the permissions in case of permission problems later.
Step 3: start training and use Yolo V2 algorithm data set for training. The specific operation methods are as follows:
# Install prerequisite packages
pip3 install -r requirements.txt -i https://mirrors.aliyun.com/pypi/simple/

cd /handpose_detection/maix_train
# initialization
python3 train.py init
# Start training
python3 train.py -t detector -d datasets/game train
Running the above command uses maix_train toolbox starts training. This program can complete training, parameter conversion, quantization and other functions with one click

100 epochs are used for training, and the results are generated in the out file.
Method 2 use online GPU for training
GPU training is called by default when running. If there is no GPU, the CPU is used, and the training time is slower than the CPU. Small partners without GPU don't have to worry. They can directly upload the data set to maixhub for online training. The limitation here is that there needs to be a K210 development board, and the data set size is less than 20M. The following is a brief introduction to the method:
The first step is to open the official website of maixhub, https://www.maixhub.com/ModelTraining , register and log in, and obtain the machine code according to the prompt on the official website;
The second step is to upload the data set cached from the grid titanium platform in the data set preparation link and start training;
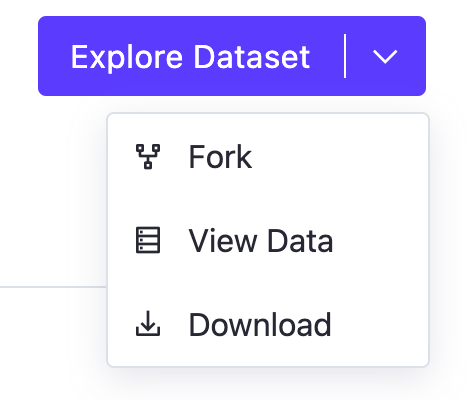
After about 20 minutes, the model will be trained. Click Download to Download the trained model. The result here is the same as the compressed file in the out folder above.

03 embedded device deployment
3.1 development environment preparation
Use kflash as a burning tool. This tool has both graphical and command-line tools. Select what we need.
In terms of coding, use VSCode to edit Python code. The Python code trained by the model needs to be fine tuned. Here, the author has debugged and published it in the managed warehouse. You can copy it directly to the memory card or serial port connection. The following describes how to deploy the training model to the final hardware device.
3.2 burning microprython firmware
Step 1: download the micro Python firmware to https://dl.sipeed.com/shareURL/MAIX/MaixPy/release/master Download a bin file, where the author uses minimum_with_kmodel_v4_support
wget https://dl.sipeed.com/fileList/MAIX/MaixPy/release/master/maixpy_v0.6.2_72_g22a8555b5/maixpy_v0.6.2_72_g22a8555b5_minimum_with_kmodel_v4_support.bin
The second step is to check the serial port number of K210. Take the MacOS used by the author as an example:
ls /dev/cu.usbserial-*
# /dev/cu.usbserial-14330
Step 3 burn
Example of burning using the command line
kflash -p /dev/cu.usbserial-14330 -b 115200 -t maixpy_v0.6.2_72_g22a8555b5_minimum_with_kmodel_v4_support.bin
Burning example using kflash graphical interface

3.3 burn target detection model parameters
There are two ways to deploy training model parameters to embedded devices:
-
Use the program burner to directly burn an address in flash, and directly load the memory pointed to by this address in the program
-
Copy the model parameters on the SD card and load them from the SD card in the program
For the first method, we generally burn the model parameters in the memory starting with 0x30000. There is no need to formulate the end. The bottom layer of the program will judge the end point by itself. Therefore, when burning, you only need to change 0x00000 to 0x30000 in kflash GUI. Of course, you can also use command line burning, which has the same effect.
For the second method, directly copy the files trained above to the SD card, and then insert the K210 development board.
3.4 model reasoning script
After the micro Python firmware and model parameters are successfully burned, the following script can be used to load the script for detection. It is recommended to open the serial port first, copy the program to run, observe the operation results, debug to normal operation, and then place it in the SD card
Step 1: copy the following code
# object detector boot.py
# generated by maixhub.com

import sensor, image, lcd, time
import KPU as kpu
import gc, sys

def lcd_show_except(e):
    import uio
    err_str = uio.StringIO()
    sys.print_exception(e, err_str)
    err_str = err_str.getvalue()
    img = image.Image(size=(240,240))
    img.draw_string(0, 10, err_str, scale=1, color=(0xff,0x00,0x00))
    lcd.display(img)

def main(anchors, labels = None, model_addr="/sd/m.kmodel", sensor_window=(240,240), lcd_rotation=0, sensor_hmirror=False, sensor_vflip=False):
    sensor.reset()
    sensor.set_pixformat(sensor.RGB565)
    sensor.set_framesize(sensor.QVGA)
    sensor.set_windowing(sensor_window)
    sensor.set_hmirror(sensor_hmirror)
    sensor.set_vflip(sensor_vflip)
    sensor.run(1)

    lcd.init(type=1, invert=True)
    lcd.rotation(lcd_rotation)
    lcd.clear(lcd.WHITE)

    if not labels:
        with open('labels.txt','r') as f:
            exec(f.read())
    if not labels:
        print("no labels.txt")
        img = image.Image(size=(320, 240))
        img.draw_string(90, 110, "no labels.txt", color=(255, 0, 0), scale=2)
        lcd.display(img)
        return 1
    try:
        img = image.Image("startup.jpg")
        lcd.display(img)
    except Exception:
        img = image.Image(size=(320, 240))
        img.draw_string(90, 110, "loading model...", color=(255, 255, 255), scale=2)
        lcd.display(img)

    try:
        task = None
        task = kpu.load(model_addr)
        kpu.init_yolo2(task, 0.5, 0.3, 5, anchors) # threshold:[0,1], nms_value: [0, 1]
        while(True):
            img = sensor.snapshot()
            t = time.ticks_ms()
            objects = kpu.run_yolo2(task, img)
            t = time.ticks_ms() - t
            if objects:
                for obj in objects:
                    pos = obj.rect()
                    img.draw_rectangle(pos)
                    img.draw_string(pos[0], pos[1], "%s : %.2f" %(labels[obj.classid()], obj.value()), scale=2, color=(255, 0, 0))
            img.draw_string(0, 200, "t:%dms" %(t), scale=2, color=(255, 0, 0))
            lcd.display(img)
    except Exception as e:
        raise e
    finally:
        if not task is None:
            kpu.deinit(task)


if __name__ == "__main__":
    try:
        labels = ["raised_fist", "victory_hand", "hand_with_fingers_splayed"]
        anchors = [3.96875, 8.8125, 3.25, 7.5, 4.4375, 6.4375, 3.3125, 5.15625, 6.125, 8.25]
        #main(anchors = anchors, labels=labels, model_addr=0x300000, lcd_rotation=0)
        main(anchors = anchors, labels=labels, model_addr="/sd/m.kmodel")
    except Exception as e:
        sys.print_exception(e)
        lcd_show_except(e)
    finally:
        gc.collect()
There are several points to note in the above code:
-
To use Yabo's K210 development board, you need to set the convert parameter to true during LCD initialization, that is, LCD init(type=1, invert=True)
-
The main function has two operation modes, namely, loading the model from flash and loading the model from SD card
Step 2: open the terminal, and the Mac can use screen and serial port to communicate
screen /dev/cu.usbserial-14340 115200
# The serial port number is not necessarily the same
(common functions exit: first ctrl+a, then press k, and then press y to confirm)
If successful, the following results will appear:

Step 3: copy the program to run interactively through the serial port
First, press Ctrl+E to enter the copy mode, and the following results appear

After copying, Ctrl+D can start running. After the program runs correctly, copy all files to SD card. After the program runs successfully, the effect is as follows

Summary and thinking
This paper provides a starting point of image depth learning algorithm training and finally deploying it on the embedded device K210. Embedded AI involves a wide range of knowledge, including target detection and embedded programming. If you are a beginner, don't be frightened by the profound knowledge. We can "learn while fighting" and learn in the process of practice.
Here are some small questions for after-school thinking:
-
What are the possible methods to improve the recognition accuracy?
-
Can we improve the recognition performance from the data itself?
-
What is the parameter conversion process of neural network parameters in this paper?