preface
>Q: what is the most smelly thing you have ever smelled in your life? > > A: My rotten dream.
Brother Meng!!! I'm here again!
This time, I can confidently say to you: I finally brought you a pub package that can really help you solve many pit ratio scenes!
Put the previous shuttle_ smart_ Dialog, on the basis of maintaining the stability of the api, has carried out various scratch head reconfigurations and solved a series of problems
Now, I can finally say: it is now a simple, powerful and low intrusive pub package!
On invasive issues
- Before, in order to solve the problem of closing the pop-up window, a very inelegant solution was used, resulting in a little high invasiveness
- This really makes me on pins and needles, like a thorn in my back, like a lump in my throat. This problem has finally been solved!
At the same time, I designed a pop-up stack inside the pub package, which can automatically remove the pop-up window at the top of the stack or remove the marked pop-up window in the stack at a fixed point.
problem
Using the system pop-up window, there are a series of pits to discuss with you
-
BuildContext must be passed
- In some scenes, we must do more communication and reference work, which is a painful but not difficult problem
-
loading Popup
- Using the system pop-up window as the loading pop-up window, I must have encountered this pit ratio problem
- Loading is encapsulated in the network library: when loading is requested for the network, press the return button and close loading
- Then after the request, I found: why is my page closed!!!
- The system pop-up window is a routing page. The pop method is used to close the system, which is easy to close the normal page by mistake
- Of course, there must be a solution. There is no detailed table here
- Using the system pop-up window as the loading pop-up window, I must have encountered this pit ratio problem
-
Multiple system dialogs pop up on a page. It is difficult to close a non stack pop-up window at a fixed point
- Eggs, which are caused by routing stack, make complaints about them.
-
In the system Dialog, the click event cannot penetrate the dark background
- I really can't do anything about this pit ratio problem
reflection
The above lists some common problems. The most serious problem should be the problem of loading
- Loading is a pop-up window for UHF use. The method of closing the loading pop-up window can also close the normally used pages, which is a hidden danger in itself
- This food dog doesn't have the ability of big factory bosses to change flutter. The food wants to change. I can only cut in from other directions and seek solutions
The Page of the system is implemented based on Overlay. We should also start with Overlay
This time, I want to help you solve it at one time: toast message, loading pop-up window, and more powerful custom dialog!
Get started quickly
initialization
- Import (please click pub to view the latest version): pub,github,click me to experience it
dependencies:
  flutter_smart_dialog: ^3.0.0
>Initialization method 1: strongly recommended 😃
- More concise configuration
void main() => runApp(MyApp());

class MyApp extends StatelessWidget {
  @override
  Widget build(BuildContext context) {
    return GetMaterialApp(
      initialRoute: RouteConfig.main,
      getPages: RouteConfig.getPages,
      // here
      navigatorObservers: [FlutterSmartDialog.observer],
      // here
      builder: FlutterSmartDialog.init(),
    );
  }
}
>Initialization mode 2: compatible with the old version ❤
- The old version initialization is still valid, the difference is: you need to call FlutterSmartDialog.monitor() before loading MaterialApp.
void main() => runApp(MyApp());

class MyApp extends StatelessWidget {
  @override
  Widget build(BuildContext context) {
    // here
    FlutterSmartDialog.monitor();
    return MaterialApp(
      home: SmartDialogPage(),
      // here
      navigatorObservers: [FlutterSmartDialog.observer],
      /// here
      builder: (BuildContext context, Widget? child) {
        return FlutterSmartDialog(child: child);
      },
    );
  }
}
>It's done 🚀
Select one of the above two initialization methods; Then, you can fully use all the functions of this library
I highly recommend the first initialization method because it is concise enough; Simple and clear things will make people feel happy when used 🌞
Minimalist use
- toast usage 💬
SmartDialog.showToast('test toast');
- loading usage ⏳
SmartDialog.showLoading();
await Future.delayed(Duration(seconds: 2));
SmartDialog.dismiss();

- dialog usage 🎨
var custom = Container(
    height: 80,
    width: 180,
    decoration: BoxDecoration(
        color: Colors.black,
        borderRadius: BorderRadius.circular(20),
    ),
    alignment: Alignment.center,
    child: Text('easy custom dialog', style: TextStyle(color: Colors.white)),
);
// here
SmartDialog.show(widget: custom, isLoadingTemp: false);
OK, as shown above, you can call the corresponding functions with very little code
Of course, there are many special optimizations in the interior. Next, I will describe them in detail
You may have questions
When initializing the framework, I felt very guilty for letting everyone write one more parameter than before 😩
Closing a page is essentially a complex situation involving
- Physical return key
- back button of AppBar
- Manual pop
In order to monitor these conditions, a route monitoring parameter has to be added
>About FlutterSmartDialog.init()
This method will not occupy your builder parameters. The init internal callback comes out of the builder. You can continue to set it boldly and safely
- For example: continue to set the global instance of Bloc 😄
class MyApp extends StatelessWidget {
  @override
  Widget build(BuildContext context) {
    return GetMaterialApp(
      initialRoute: RouteConfig.main,
      getPages: RouteConfig.getPages,
      navigatorObservers: [FlutterSmartDialog.observer],
      builder: FlutterSmartDialog.init(builder: _builder),
    );
  }
}

Widget _builder(BuildContext context, Widget? child) {
  return MultiBlocProvider(
    providers: [
      BlocProvider.value(value: BlocSpanOneCubit()),
    ],
    child: child!,
  );
}
>Entity return key
Monitoring the return button is very important and can basically cover most situations
>Pop routing
Although the monitoring of the return button can cover most scenarios, some manual pop scenarios need to add parameter monitoring
- Without FlutterSmartDialog.observer
- If the penetration parameter is turned on (you can interact with the page after the pop-up window), then close the page manually
- There will be such an embarrassing situation
- With FlutterSmartDialog.observer, it can be handled reasonably
- Of course, the transition animation here also provides parameters to control whether it is turned on ❤
>Super practical parameter: backdisassiss
- This parameter is set to true by default, and the pop-up window will be closed by default when returning; If set to false, the page will not be closed
- In this way, you can easily make an emergency pop-up window to prohibit the user's next operation
- Let's look at a scenario: suppose an open source author decides to abandon the software and does not allow users to use the pop-up window of the software
SmartDialog.show(
  // here
  backDismiss: false,
  clickBgDismissTemp: false,
  isLoadingTemp: false,
  widget: Container(
    height: 480,
    width: 500,
    padding: EdgeInsets.all(20),
    decoration: BoxDecoration(
      borderRadius: BorderRadius.circular(20),
      color: Colors.white,
    ),
    alignment: Alignment.topCenter,
    child: SingleChildScrollView(
      child: Wrap(
        direction: Axis.vertical,
        crossAxisAlignment: WrapCrossAlignment.center,
        spacing: 10,
        children: [
          // title
          Text(
            'Extraordinary announcement',
            style: TextStyle(fontSize: 30, fontWeight: FontWeight.bold),
          ),
          // content
          Text('I studied the following secret script day and night and finally succeeded in catching a rich woman'),
          Image.network(
            'https://cdn.jsdelivr.net/gh/xdd666t/MyData@master/pic/flutter/blog/20211102213746.jpeg',
            height: 200,
            width: 400,
          ),
          Text('I thought for three seconds, with\'heavy\'I decided to abandon the open source software'),
          Text('My future life is a rich woman and far away, no longer\'energy\' Maintain this open source software'),
          Text('I'll see you in the Jianghu!'),
          // button (only method of close the dialog)
          ElevatedButton(
            onPressed: () => SmartDialog.dismiss(),
            child: Text('Goodbye!'),
          )
        ],
      ),
    ),
  ),
);
As can be seen from the effect drawing above
- Click the mask to close the pop-up window
- Click the back button to close the pop-up window
- We can only click our own button to close the pop-up window. The logic of clicking the button can be directly written as closing app and so on
It only needs two simple parameter settings to realize such a great emergency pop-up window
>Set global parameters
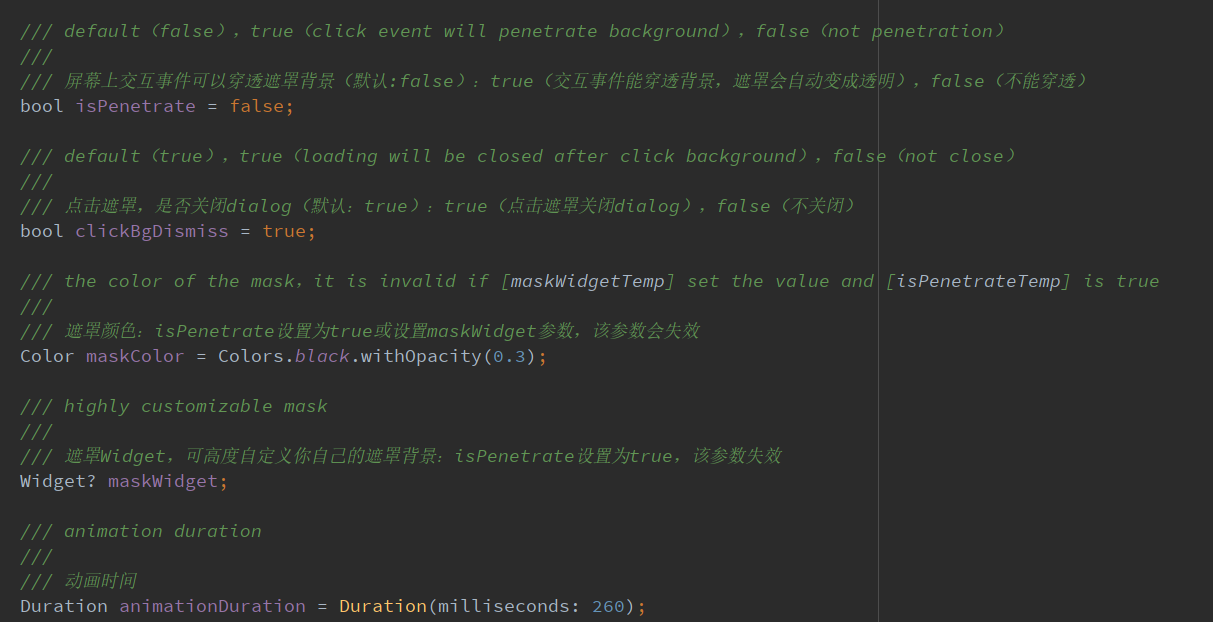
The global parameters of SmartDialog have a reasonable default value
In order to cope with changeable scenarios, you can modify the global parameters to meet your own requirements
- Set the data that meets your requirements, put it in the app entry, and initialize it
- Note: if there are no special requirements, you can completely avoid initializing global parameters
SmartDialog.config
    ..alignment = Alignment.center
    ..isPenetrate = false
    ..clickBgDismiss = true
    ..maskColor = Colors.black.withOpacity(0.3)
    ..maskWidget = null
    ..animationDuration = Duration(milliseconds: 260)
    ..isUseAnimation = true
    ..isLoading = true;
- The code comments are well written. If you don't understand a parameter, just click in and have a look
Toast
Particularity of toast
Strictly speaking, toast is a very special pop-up window. I think it should have the following characteristics
>Toast messages should be displayed one by one, and subsequent messages should not top off the previous toast
- This is a pit. If the interior of the frame is not handled, it is easy to see that the rear toast will directly top the front toast

>It is displayed at the top of the page and should not be obscured by some pop-up windows
- It can be found that the masks of loading and dialog do not obscure the toast information

>Handle the occlusion of the keyboard
- The keyboard is a bit of a pit. It will directly block all the layouts and can only save the country by curving
- A special treatment is made here. When the keyboard is aroused, toast will dynamically adjust the distance between itself and the bottom of the screen
- In this way, the keyboard will not block the toast effect
Customize Toast
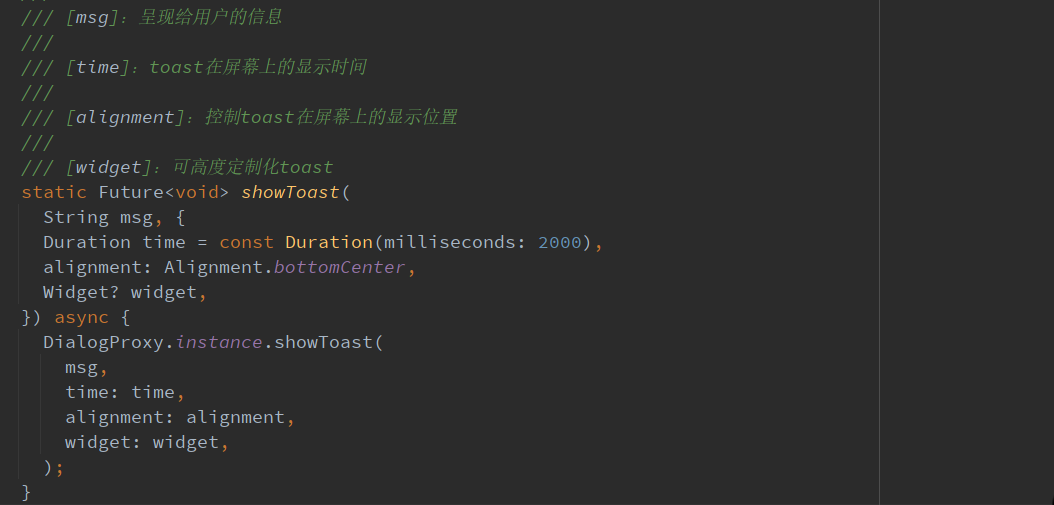
>Parameter description
toast does not expose many parameters, only four parameters are provided
- For example: Toast font size, font color, toast background color, etc. I didn't provide parameters
- First, I feel that providing these parameters will make the whole parameter input very much, and the confusion will gradually become charming
- Second, I feel that even if I provide many parameters, it will not necessarily meet those strange aesthetic and needs
- Based on the above considerations, I directly provide the underlying parameters and directly provide the widget parameters
- You can customize the toast as you like
- Note: if widget parameters are used, msg and alignment parameters will become invalid
>Adjust the position of toast display
SmartDialog.showToast('the toast at the bottom');
SmartDialog.showToast('the toast at the center', alignment: Alignment.center);
SmartDialog.showToast('the toast at the top', alignment: Alignment.topCenter);

>More powerful custom toast
- First, the whole custom toast
class CustomToast extends StatelessWidget {
  const CustomToast(this.msg, {Key? key}) : super(key: key);

  final String msg;

  @override
  Widget build(BuildContext context) {
    return Align(
      alignment: Alignment.bottomCenter,
      child: Container(
        margin: EdgeInsets.only(bottom: 30),
        padding: EdgeInsets.symmetric(horizontal: 20, vertical: 7),
        decoration: BoxDecoration(
          color: _randomColor(),
          borderRadius: BorderRadius.circular(100),
        ),
        child: Row(mainAxisSize: MainAxisSize.min, children: [
          //icon
          Container(
            margin: EdgeInsets.only(right: 15),
            child: Icon(Icons.add_moderator, color: _randomColor()),
          ),

          //msg
          Text('$msg', style: TextStyle(color: Colors.white)),
        ]),
      ),
    );
  }

  Color _randomColor() {
    return Color.fromRGBO(
      Random().nextInt(256),
      Random().nextInt(256),
      Random().nextInt(256),
      1,
    );
  }
}
- use
SmartDialog.showToast('', widget: CustomToast('custom toast'));
- effect
Loading article
Pit avoidance Guide
- After loading is enabled, you can close it in the following ways
- Smartdialog. Disass(): you can close loading and dialog
- status is set to SmartStatus.loading: just turn off loading
// easy close
SmartDialog.dismiss();
// exact close
SmartDialog.dismiss(status: SmartStatus.loading);
- Generally speaking, the loading pop-up window is encapsulated in the network library and automatically opens and closes with the request status
- Based on this scenario, I suggest that when using dismis, add the status parameter and set it to SmartStatus.loading
- Pit ratio scene
- When the network requests to load, loading is also opened. At this time, it is easy to touch the return button by mistake to close loading
- When the network request ends, the dismiss method is automatically called
- Because loading has been closed, assuming that there is a SmartDialog pop-up window on the page at this time, disass without status will close the SmartDialog pop-up window
- Of course, this situation is easy to solve. For loading encapsulated in the network library, use: smartdialog. Dismis (status: smartstatus. Loading); Just close it
- The status parameter is designed to accurately close the pop-up window of the corresponding type. It can play a great role in some special scenarios
- If you understand the meaning of this parameter, you will know when to add the status parameter
Parameter description
The parameters are written in the notes in great detail, so I won't repeat them. Let's see the effect
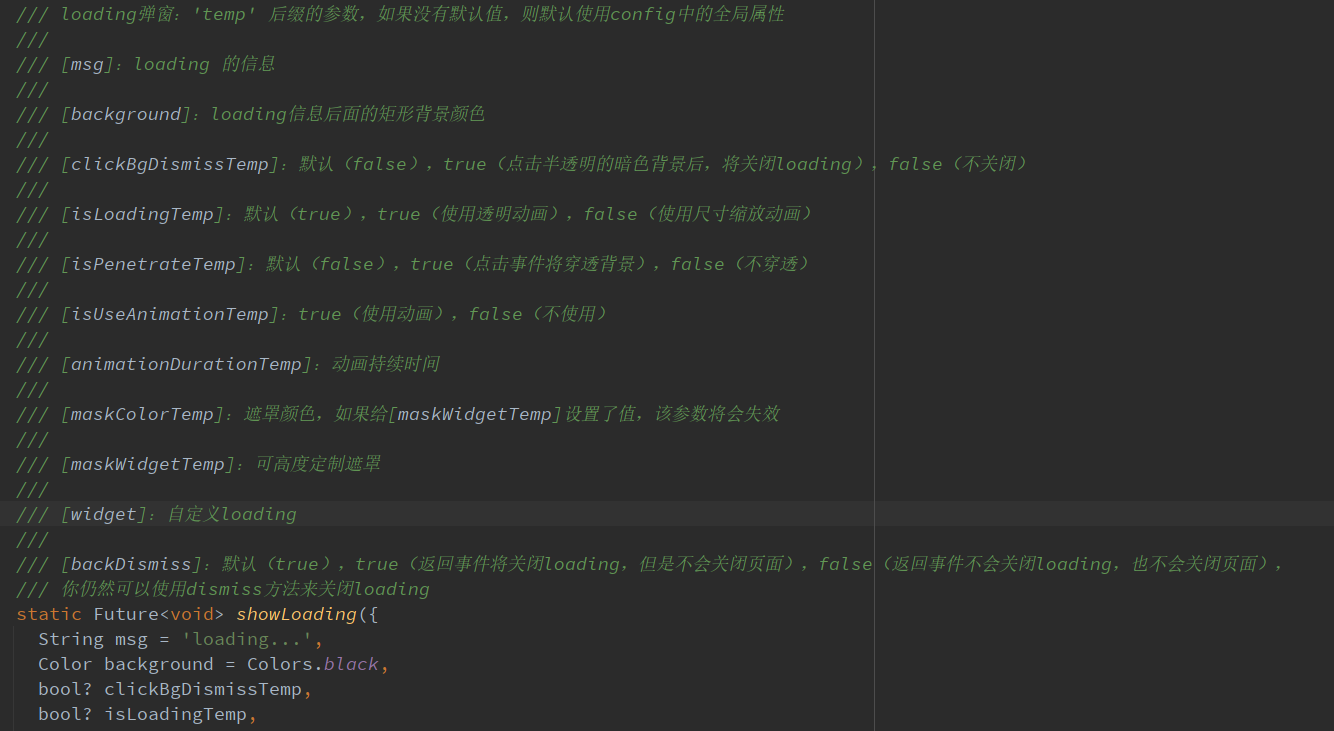
- maskWidgetTemp: powerful mask customization 😆, Play your brain hole...
var maskWidget = Container(
  width: double.infinity,
  height: double.infinity,
  child: Opacity(
    opacity: 0.6,
    child: Image.network(
      'https://cdn.jsdelivr.net/gh/xdd666t/MyData@master/pic/flutter/blog/20211101103911.jpeg',
      fit: BoxFit.fill,
    ),
  ),
);
SmartDialog.showLoading(maskWidgetTemp: maskWidget);
- maskColorTemp: supports quick custom mask colors
SmartDialog.showLoading(maskColorTemp: randomColor().withOpacity(0.3));

/// random color
Color randomColor() => Color.fromRGBO(
    Random().nextInt(256), Random().nextInt(256), Random().nextInt(256), 1);

- Background: supports loading custom background
SmartDialog.showLoading(background: randomColor());

/// random color
Color randomColor() => Color.fromRGBO(
    Random().nextInt(256), Random().nextInt(256), Random().nextInt(256), 1);

- isLoadingTemp: animation effect Toggle
SmartDialog.showLoading(isLoadingTemp: false);

- isPenetrateTemp: interactive events can penetrate the mask, which is a very useful function and is key to some special demand scenarios
SmartDialog.showLoading(isPenetrateTemp: true);

Custom Loading
Using showLoading, you can easily customize a powerful loading pop-up window; My brain hole is limited. Let's simply demonstrate it
>Customize a loading layout
class CustomLoading extends StatefulWidget {
  const CustomLoading({Key? key, this.type = 0}) : super(key: key);

  final int type;

  @override
  _CustomLoadingState createState() => _CustomLoadingState();
}

class _CustomLoadingState extends State<customloading>
    with TickerProviderStateMixin {
  late AnimationController _controller;

  @override
  void initState() {
    _controller = AnimationController(
      duration: const Duration(milliseconds: 800),
      vsync: this,
    );
    _controller.forward();
    _controller.addStatusListener((status) {
      if (status == AnimationStatus.completed) {
        _controller.reset();
        _controller.forward();
      }
    });
    super.initState();
  }

  @override
  Widget build(BuildContext context) {
    return Stack(children: [
      // smile
      Visibility(visible: widget.type == 0, child: _buildLoadingOne()),

      // icon
      Visibility(visible: widget.type == 1, child: _buildLoadingTwo()),

      // normal
      Visibility(visible: widget.type == 2, child: _buildLoadingThree()),
    ]);
  }

  Widget _buildLoadingOne() {
    return Stack(alignment: Alignment.center, children: [
      RotationTransition(
        alignment: Alignment.center,
        turns: _controller,
        child: Image.network(
          'https://cdn.jsdelivr.net/gh/xdd666t/MyData@master/pic/flutter/blog/20211101174606.png',
          height: 110,
          width: 110,
        ),
      ),
      Image.network(
        'https://cdn.jsdelivr.net/gh/xdd666t/MyData@master/pic/flutter/blog/20211101181404.png',
        height: 60,
        width: 60,
      ),
    ]);
  }

  Widget _buildLoadingTwo() {
    return Stack(alignment: Alignment.center, children: [
      Image.network(
        'https://cdn.jsdelivr.net/gh/xdd666t/MyData@master/pic/flutter/blog/20211101162946.png',
        height: 50,
        width: 50,
      ),
      RotationTransition(
        alignment: Alignment.center,
        turns: _controller,
        child: Image.network(
          'https://cdn.jsdelivr.net/gh/xdd666t/MyData@master/pic/flutter/blog/20211101173708.png',
          height: 80,
          width: 80,
        ),
      ),
    ]);
  }

  Widget _buildLoadingThree() {
    return Center(
      child: Container(
        height: 120,
        width: 180,
        decoration: BoxDecoration(
          color: Colors.white,
          borderRadius: BorderRadius.circular(15),
        ),
        alignment: Alignment.center,
        child: Column(mainAxisSize: MainAxisSize.min, children: [
          RotationTransition(
            alignment: Alignment.center,
            turns: _controller,
            child: Image.network(
              'https://cdn.jsdelivr.net/gh/xdd666t/MyData@master/pic/flutter/blog/20211101163010.png',
              height: 50,
              width: 50,
            ),
          ),
          Container(
            margin: EdgeInsets.only(top: 20),
            child: Text('loading...'),
          ),
        ]),
      ),
    );
  }

  @override
  void dispose() {
    _controller.dispose();
    super.dispose();
  }
}
>Let's see the effect
- Effect one
SmartDialog.showLoading(isLoadingTemp: false, widget: CustomLoading());
await Future.delayed(Duration(seconds: 2));
SmartDialog.dismiss();

- Effect II
SmartDialog.showLoading(
    isLoadingTemp: false,
    widget: CustomLoading(type: 1),
);
await Future.delayed(Duration(seconds: 2));
SmartDialog.dismiss();
- Effect three
SmartDialog.showLoading(widget: CustomLoading(type: 2));
await Future.delayed(Duration(seconds: 2));
SmartDialog.dismiss();
Dialog
garish
>The pop-up window pops up from different positions, and the animation is different
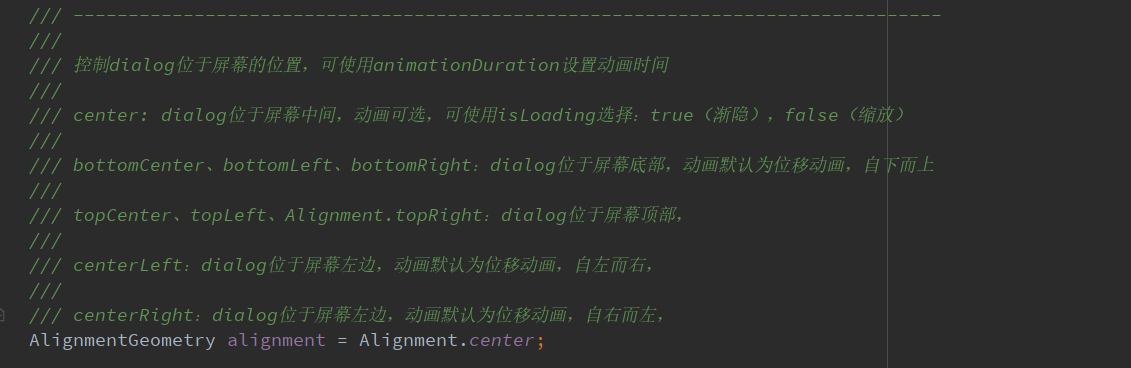
- alignmentTemp: the animation effect will be different with different parameter settings
var location = ({
    double width = double.infinity,
    double height = double.infinity,
}) {
    return Container(width: width, height: height, color: randomColor());
};

//left
SmartDialog.show(
    widget: location(width: 50),
    alignmentTemp: Alignment.centerLeft,
);
await Future.delayed(Duration(milliseconds: 500));
//top
SmartDialog.show(
    widget: location(height: 50),
    alignmentTemp: Alignment.topCenter,
);
await Future.delayed(Duration(milliseconds: 500));
//right
SmartDialog.show(
    widget: location(width: 50),
    alignmentTemp: Alignment.centerRight,
);
await Future.delayed(Duration(milliseconds: 500));
//bottom
SmartDialog.show(
    widget: location(height: 50),
    alignmentTemp: Alignment.bottomCenter,
);
await Future.delayed(Duration(milliseconds: 500));
//center
SmartDialog.show(
    widget: location(height: 100, width: 100),
    alignmentTemp: Alignment.center,
    isLoadingTemp: false,
);
- isPenetrateTemp: interactive event penetration mask
SmartDialog.show(
    alignmentTemp: Alignment.centerRight,
    isPenetrateTemp: true,
    clickBgDismissTemp: false,
    widget: Container(
        width: 80,
        height: double.infinity,
        color: randomColor(),
    ),
);

dialog stack
- This is a powerful and practical function!
- You can easily close a pop-up window at a fixed point
var stack = ({
  double width = double.infinity,
  double height = double.infinity,
  String? msg,
}) {
  return Container(
    width: width,
    height: height,
    color: randomColor(),
    alignment: Alignment.center,
    child: Text('Popup $msg', style: TextStyle(color: Colors.white)),
  );
};

//left
SmartDialog.show(
  tag: 'A',
  widget: stack(msg: 'A', width: 60),
  alignmentTemp: Alignment.centerLeft,
);
await Future.delayed(Duration(milliseconds: 500));
//top
SmartDialog.show(
  tag: 'B',
  widget: stack(msg: 'B', height: 60),
  alignmentTemp: Alignment.topCenter,
);
await Future.delayed(Duration(milliseconds: 500));
//right
SmartDialog.show(
  tag: 'C',
  widget: stack(msg: 'C', width: 60),
  alignmentTemp: Alignment.centerRight,
);
await Future.delayed(Duration(milliseconds: 500));
//bottom
SmartDialog.show(
  tag: 'D',
  widget: stack(msg: 'D', height: 60),
  alignmentTemp: Alignment.bottomCenter,
);
await Future.delayed(Duration(milliseconds: 500));

//center: the stack handler
SmartDialog.show(
  alignmentTemp: Alignment.center,
  isLoadingTemp: false,
  widget: Container(
    decoration: BoxDecoration(
        color: Colors.white, borderRadius: BorderRadius.circular(15)),
    padding: EdgeInsets.symmetric(horizontal: 30, vertical: 20),
    child: Wrap(spacing: 20, children: [
      ElevatedButton(
        child: Text('Close pop-up window A'),
        onPressed: () => SmartDialog.dismiss(tag: 'A'),
      ),
      ElevatedButton(
        child: Text('Close pop-up window B'),
        onPressed: () => SmartDialog.dismiss(tag: 'B'),
      ),
      ElevatedButton(
        child: Text('Close pop-up window C'),
        onPressed: () => SmartDialog.dismiss(tag: 'C'),
      ),
      ElevatedButton(
        child: Text('Close pop-up window D'),
        onPressed: () => SmartDialog.dismiss(tag: 'D'),
      ),
    ]),
  ),
);
Coquettish tips
There is a scene that compares egg cones
- We use stateful widget to encapsulate a small component
- In a special case, we need to trigger a method inside the component outside the component
- There are many implementation methods for this scenario, but it may be a little troublesome
Here is a simple idea, which can easily trigger a method inside the component
- Create a widget
class OtherTrick extends StatefulWidget {
  const OtherTrick({Key? key, this.onUpdate}) : super(key: key);

  final Function(VoidCallback onInvoke)? onUpdate;

  @override
  _OtherTrickState createState() => _OtherTrickState();
}

class _OtherTrickState extends State<othertrick> {
  int _count = 0;

  @override
  void initState() {
    // here
    widget.onUpdate?.call(() {
      _count++;
      setState(() {});
    });

    super.initState();
  }

  @override
  Widget build(BuildContext context) {
    return Center(
      child: Container(
        padding: EdgeInsets.symmetric(horizontal: 50, vertical: 20),
        decoration: BoxDecoration(
          color: Colors.white,
          borderRadius: BorderRadius.circular(10),
        ),
        child: Text('Counter:  $_count ', style: TextStyle(fontSize: 30.0)),
      ),
    );
  }
}
- Show the component and trigger it externally
VoidCallback? callback;

// display
SmartDialog.show(
  alignmentTemp: Alignment.center,
  widget: OtherTrick(
    onUpdate: (VoidCallback onInvoke) => callback = onInvoke,
  ),
);

await Future.delayed(Duration(milliseconds: 500));

// handler
SmartDialog.show(
  alignmentTemp: Alignment.centerRight,
  maskColorTemp: Colors.transparent,
  widget: Container(
    height: double.infinity,
    width: 150,
    color: Colors.white,
    alignment: Alignment.center,
    child: ElevatedButton(
      child: Text('add'),
      onPressed: () => callback?.call(),
    ),
  ),
);
- Let's see the effect

last
>Relevant address
- github: flutter_smart_dialog
- demo address in the text: flutter_use
- Demo demo effect: Online experience
>Alas, people always move forward in constant confusion...
</othertrick></customloading>