Video streaming with flash
Flash video stream
Streaming -- streaming
It enables flash applications to effectively break large responses into small pieces over a long period of time.
To illustrate this topic, I'll show you how to build a real-time video streaming server!
What is Streaming? (what is streaming media?)
- Streaming is a technology in which the server provides a response to a request in the form of a block.
Useful reasons:
-
Very large responses _ Great response.
For very large responses, it may be inefficient to assemble the response only in memory to return it to the client.An alternative is to write the response to disk and then use to return the file flash send_ file()
But this increases I / O.Assuming that data can be generated in blocks, it is a better solution to provide responses in small parts.
-
Real time data._ Real time data.
For some applications, the request may need to return data from a real-time source.
Live video or audio feeds are a good example.
Many security cameras use this technology: streaming video to a Web browser.
Implementing streaming with flash
- Flask uses generator functions Provides native support for streaming responses.
- Generator is a special function that can be interrupted and restored.
Consider the following functions:
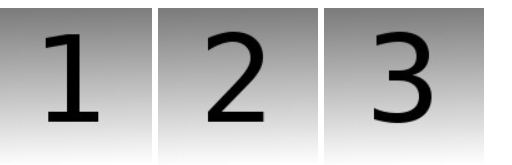
def gen():
    yield 1
    yield 2
    yield 3
This function runs in three steps, each of which returns a value.
- A generator function can return multiple results in order.
Flash uses this feature of generator function to realize streaming.
The following example shows how to use streaming technology to generate large data tables without having to assemble the entire table in memory:
from flask import Response, render_template
from app.models import Stock

def generate_stock_table():
    yield render_template('stock_header.html')
    for stock in Stock.query.all():
        yield render_template('stock_row.html', stock=stock)
    yield render_template('stock_footer.html')

@app.route('/stock-table')
def stock_table():
    return Response(generate_stock_table())
In this example, you can see how flash works with the generator function.
- The route that returns the streaming Response needs to return a Response, and the object initialized with the generator function.
- Then Flask is responsible for calling the generator and sending all partial results to the client as blocks.
Multipart Responses
The above table example will generate a traditional page in a small part
All parts are connected to the final document
- This is a good example of how to generate a large response, but what's more exciting is to use real-time data.
An interesting use of stream is:
- Let each block replace the previous block in the page,
- This allows the stream to "play" or animate in the browser window.
Using this technique, you can make each block in the stream an image
- So as to provide you with the video running in the browser!
The secret of local update is:
Use multipart responses.
- The multipart response contains a header that contains one of the multipart content types
- Marked by boundary
- Each section has its own content specific type.
There are several multipart content types that can meet different needs.
In order to use multipart/x-mixed-replace in a stream where each part replaces the previous part, a content type must be used.
- The following is the structure of multi part video stream:
HTTP/1.1 200 OK
Content-Type: multipart/x-mixed-replace; boundary=frame

--frame
Content-Type: image/jpeg

<jpeg data here>
--frame
Content-Type: image/jpeg

<jpeg data here>
...
As you can see above, the structure is very simple
- Set the main content type header to multipart/x-mixed-replace and define the boundary string.
-
- Each part is then included, prefixed with two dashes and a part boundary string in their own line.
These sections have their own content type headers
And each part can optionally contain a content length header
- The length of the header is the number of bytes of the partial payload, but at least for the image, the browser can process the stream without this length.
.
Building a real-time video streaming server
- Build a complete application to transmit real-time video stream to Web browser.
There are many ways to stream video to the browser, and each method has its advantages and disadvantages.
-
The method that works well with the streaming function of Flask is to stream a series of independent JPEG images.
This is called Motion JPEGMotion JPEG, namely motion JPEG (M-JPEG or MJPEG), is a video compression format in which each video frame or interlaced field of digital video sequence is compressed into JPEG image respectively.
It is also used by many IP security cameras.
- The delay time of this method is very short, but the quality is not the best, because JPEG compression is not very effective for moving video.
In the following, a very simple but complete Web application can provide services for Motion JPEG streams:
#!/usr/bin/env python
from flask import Flask, render_template, Response
from camera import Camera

app = Flask(__name__)

@app.route('/')
def index():
    return render_template('index.html')

def gen(camera):
    while True:
        frame = camera.get_frame()
        yield (b'--frame\r\n'
               b'Content-Type: image/jpeg\r\n\r\n' + frame + b'\r\n')

@app.route('/video_feed')
def video_feed():
    return Response(gen(Camera()),
                    mimetype='multipart/x-mixed-replace; boundary=frame')

if __name__ == '__main__':
    app.run(host='0.0.0.0', debug=True)
The application imports a class in which Camera is responsible for providing frame sequence.
In this case, it is a good idea to put the camera control part in a separate module
In this way, Web applications remain clean, simple and versatile.
The application has two routes. The / route will serve at index The home page defined in the HTML template.
See the contents of the file below:
<html>
  <head>
    <title>Video Streaming Demonstration</title>
  </head>
  <body>
    <h1>Video Streaming Demonstration</h1>
    <img src="{{ url_for('video_feed') }}">
  </body>
</html>
Notice that the src attribute of the image tag points to the second route of this application
- This is where magic happens.
- The / video_ The feed route returns a stream response.
Because this flow returns the image to be displayed in the web page, the URLsrc of this route is in the attribute of the image tag.
The browser automatically updates the image elements by displaying the JPEG image stream in it
- Because most / all browsers support multipart responses *.
/video_ The generator function used in feed routing is called gen()
- And take the instance of Camera class as a parameter.
In mimetype, set the multipart/x-mixed-replace content type, boundary and boundary to the string "frame" with parameters.
@app.route('/video_feed')
def video_feed():
    return Response(gen(Camera()),
                    mimetype='multipart/x-mixed-replace; boundary=frame')
Get frames from camera_ Obtaining Frames from a Video Camera
The rest is to implement the Camera class
- This class must be connected to the camera hardware and download real-time video frames from it.
The benefits of encapsulating the hardware related parts of this application in a class are:
- This class can provide different implementations for different people
- But the rest of the application remains the same.
This class can be regarded as a device driver. No matter what actual hardware device is used, it can provide a unified implementation.
Another advantage of separating the Camera class from the rest of the application is:
- It's easy for an app to fool the app into thinking there's actually no camera
- Because the camera class can be implemented to simulate the camera without actual hardware.
In fact, when I was developing this application, the easiest way to test the flow was to do so without worrying about the hardware until I ran all the other functions.
Below, you can see the simple analog camera implementation I used:
from time import time

class Camera(object):
    def __init__(self):
        self.frames = [open(f + '.jpg', 'rb').read() for f in ['1', '2', '3']]

    def get_frame(self):
        return self.frames[int(time()) % 3]
This implementation reads three images from disk:
1.jpg,2.jpg,3.jpg
- Then return them to repeat each other at the rate of one frame per second.
The get_ The frame () method uses the current time in seconds
- To determine which of the three frames to return at any given time.
To run this simulation camera, I need to create three frames.
After starting the application, enter[ http://localhost:5000Web ]Browser, you will see the simulated video stream playing 1, 2 and 3 images repeatedly.
Limitations of streaming media
- When a flash application processes regular requests, the request cycle is short.
- The network worker receives the request, calls the handler function, and finally returns the response.
Once the response is sent back to the client, the staff is free to prepare to accept another request.
When receiving a request to use streaming: - The worker remains connected to the client for the duration of the stream.
When using a long, never-ending stream, such as a video stream from a camera, the staff will remain locked until the client is disconnected. - This actually means that unless specific measures are taken, the application can only serve as many clients as Web workers.
- When using a flash application in debug mode, this means that there is only one, so you will not be able to connect to the second browser window to watch streams from two locations at the same time.
Overcome this important limitation. I think the best solution is:
Use a collaboration based Web server that is fully supported by Flask, such as gevent.
- By using coprocessing, gevent can handle multiple clients on a single worker thread,
- Because gevent modified Python I / O functions to issue context switches as needed.
follow-up
This article is very popular, not because it teaches how to implement streaming response
-
But because many people want to implement streaming video server.
-
Unfortunately, as I write this article, my focus is not on creating powerful video servers
Some improvements to the server.
Review: video streaming using flash
- In short, this is a Flask server
It uses a stream response to provide a stream of video frames captured from a moving JPEG format camera.
This format is very simple and not the most effective, but its advantage is that all browsers can support it locally
No client script is required.
- Therefore, this is a fairly common format used by security cameras.
- In order to demonstrate the server, I used its camera module to implement the camera driver for Raspberry Pi.
For those who do not have Pi equipped with camera, I also wrote a simulated camera driver, which can stream jpeg image sequences stored on disk.
The background thread that captures video frames starts, but never stops
When the first client connects to the stream, the background thread that captures video frames from the Raspberry Pi camera starts, but never stops.
- A more efficient way to handle this background thread is:
Run it only if you have a viewer so that you can turn off the camera when no one is connected.
The improvement idea is:
- Whenever a client accesses a frame, the current time of the access is recorded.
- The camera thread checks this timestamp. If it finds that the timestamp is earlier than ten seconds, it exits.
- After making this change, if the server runs without any clients for ten seconds, it will turn off its camera and stop all background activity.
- When the client reconnects, the thread restarts.
class Camera(object):
    # ...
    last_access = 0  # time of last client access to the camera

    # ...

    def get_frame(self):
        Camera.last_access = time.time()
        # ...

    @classmethod
    def _thread(cls):
        with picamera.PiCamera() as camera:
            # ...
            for foo in camera.capture_continuous(stream, 'jpeg', use_video_port=True):
                # ...
                # if there hasn't been any clients asking for frames in
                # the last 10 seconds stop the thread
                if time.time() - cls.last_access > 10:
                    break
        cls.thread = None
Simplify camera categories_ Simplifying the Camera Class
A common problem is that it is difficult to add support for other cameras.
The class implemented by Camera for Raspberry Pi is quite complex because it uses background capture threads to communicate with Camera hardware.
Simplify operations:
The general function of all background processing of the framework is moved to the base class
- Only the task of obtaining the framework from the camera to implement in the subclass is left.
New class base in baseamera module_ camera. Py implements this base class.
This is what a generic thread looks like:
class BaseCamera(object):
    thread = None  # background thread that reads frames from camera
    frame = None  # current frame is stored here by background thread
    last_access = 0  # time of last client access to the camera
    # ...

    @staticmethod
    def frames():
        """Generator that returns frames from the camera."""
        raise RuntimeError('Must be implemented by subclasses.')

    @classmethod
    def _thread(cls):
        """Camera background thread."""
        print('Starting camera thread.')
        frames_iterator = cls.frames()
        for frame in frames_iterator:
            BaseCamera.frame = frame

            # if there hasn't been any clients asking for frames in
            # the last 10 seconds then stop the thread
            if time.time() - BaseCamera.last_access > 10:
                frames_iterator.close()
                print('Stopping camera thread due to inactivity.')
                break
        BaseCamera.thread = None
This new version of Raspberry Pi's camera thread has become common by using another generator.
- The thread wants the frames() method (which is a static method) to be a generator implemented in subclasses specific to different cameras.
- Each item returned by the iterator must be a video frame in jpeg format.
How to apply a simulated camera that returns a still image to this base class:
class Camera(BaseCamera):
    """An emulated camera implementation that streams a repeated sequence of
    files 1.jpg, 2.jpg and 3.jpg at a rate of one frame per second."""
    imgs = [open(f + '.jpg', 'rb').read() for f in ['1', '2', '3']]

    @staticmethod
    def frames():
        while True:
            time.sleep(1)
            yield Camera.imgs[int(time.time()) % 3]
Note that in this release:
- How does the frames() generator force a frame rate of one frame per second by simply sleeping between frames.
Through this redesign, the camera subclass of Raspberry Pi camera has also become simpler:
import io
import picamera
from base_camera import BaseCamera

class Camera(BaseCamera):
    @staticmethod
    def frames():
        with picamera.PiCamera() as camera:
            # let camera warm up
            time.sleep(2)

            stream = io.BytesIO()
            for foo in camera.capture_continuous(stream, 'jpeg', use_video_port=True):
                # return current frame
                stream.seek(0)
                yield stream.read()

                # reset stream for next frame
                stream.seek(0)
                stream.truncate()
OpenCV camera driver
A considerable number of users complained that they could not access the Raspberry Pi equipped with the camera module, so they could not use any device other than the analog camera to try to use the server.
- Now it's much easier to add a camera driver. I also hope to have a camera based on OpenCV
- The camera supports most USB webcams and laptop cameras.
This is a simple camera driver:
import cv2
from base_camera import BaseCamera

class Camera(BaseCamera):
    @staticmethod
    def frames():
        camera = cv2.VideoCapture(0)
        if not camera.isOpened():
            raise RuntimeError('Could not start camera.')

        while True:
            # read current frame
            _, img = camera.read()

            # encode as a jpeg image and return it
            yield cv2.imencode('.jpg', img)[1].tobytes()
In this class, the first camera reported by the system will be used.
- If you are using a laptop, it may be your built-in camera.
- If you want to use this driver, you need to install OpenCV binding for Python:
$ pip install opencv-python
Camera selection
The project now supports three different camera drivers: simulation, Raspberry Pi and OpenCV.
- To make it easier to select the driver to use without editing the code,
The Flask server will look for a CAMERA environment variable to know the class to be imported.
- This variable can be set to pi or opencv. If it is not set, the simulation camera will be used by default.
from importlib import import_module
import os

# import camera driver
if os.environ.get('CAMERA'):
    Camera = import_module('camera_' + os.environ['CAMERA']).Camera
else:
    from camera import Camera
This implementation is quite general
- Regardless of the value of the CAMERA environment variable
- All servers want the driver to be in a module named camera_$CAMERA.py.
- The server will import this module, and then Camera will look for a class in it.
Performance improvement
Another result observed several times is that the server consumes a lot of CPU.
- The reason for this is that there is no synchronization between the frames captured by the background thread and the generator that feeds them to the client.
- Both run as fast as possible, regardless of each other's speed.
To avoid adding event processing logic to the generator, I decided to implement a custom event class:
- This class uses the caller's thread ID to automatically create and manage a separate event for each client thread.
- To be honest, this is a bit complicated, but the idea comes from how Flash's context local variables are implemented.
- The new event class is called CameraEvent and has wait(), set() and clear() methods.
With the support of this class, you can add the rate control mechanism to baseamera:
class CameraEvent(object):
    # ...

class BaseCamera(object):
    # ...
    event = CameraEvent()

    # ...

    def get_frame(self):
        """Return the current camera frame."""
        BaseCamera.last_access = time.time()

        # wait for a signal from the camera thread
        BaseCamera.event.wait()
        BaseCamera.event.clear()

        return BaseCamera.frame

    @classmethod
    def _thread(cls):
        # ...
        for frame in frames_iterator:
            BaseCamera.frame = frame
            BaseCamera.event.set()  # send signal to clients

            # ...
The magic done in the CameraEvent class enables multiple clients to wait for new frames respectively.
- The wait() method assigns a separate event object to each client using the current thread ID, and then waits for it.
- The clear() method resets the event associated with the caller's thread ID so that each generator thread can run at its own speed.
- The method called by the set() camera thread sends a signal to the event object assigned to all clients, and will also delete any events not provided by its owner, because this means that the client associated with these events has closed the connection and disappeared.
After making these changes, the same class will consume about 3% of CPU
In both cases, only one client views the stream.
For a single client, the OpenCV driver is reduced from about 45% CPU to 12%, and each new client is increased by about 3%.
[reference]
article video streaming with Flask : http://blog.miguelgrinberg.com/post/video-streaming-with-flask
follow-up Flask Video Streaming Revisited.: https://blog.miguelgrinberg.com/post/flask-video-streaming-revisited
GitHub: https://github.com/miguelgrinberg/flask-video-streaming