The whole process of Jetson nano from configuration environment to yolov5 successful reasoning detection
1, Burn image
Official image download address on the official website: https://developer.nvidia.com/embedded/downloads
You may not be able to download it, so I provided Baidu cloud link to download it. The download address is as follows:
Link: https://pan.baidu.com/s/1njWhDqNquyUqnDRCp31y8w
Extraction code: 6qqh
1. Two burning configuration software need to be downloaded. The following two software are recommended here: one is to format the SD card (at least 64G is recommended for the SD card) and the other is to burn the software
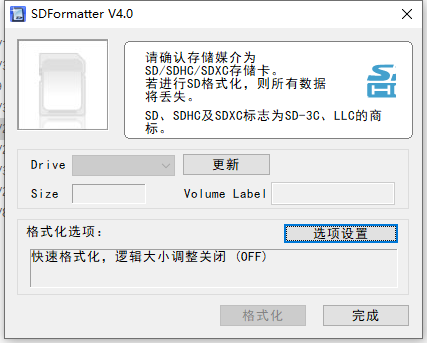
1.1 SD Card Formatter: format the SD card (burn the image after formatting)
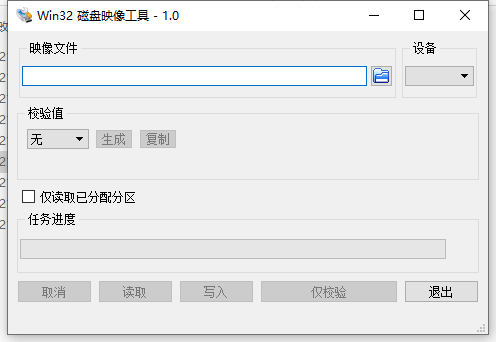
1.2 Win32 Diskimg: write the image into the SD card (be sure to unzip the downloaded image. When you see the. img file, you can burn the image according to the following steps, which may take half an hour)
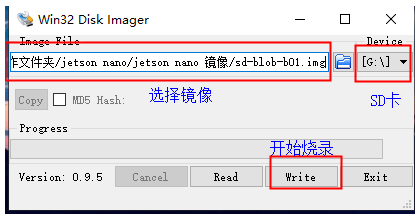
(ignore the differences between the two pictures in English and Chinese, and burn them according to the above steps)
2, Configure the environment and reason successfully
1. Update system and package
Open a terminal and enter the following codes in sequence
sudo apt-get update
sudo apt-get upgrade
You may also need to install a Chinese input method
ibus-pinyin
sudo apt-get install ibus-pinyin
Restart it before you can see it in language support
reboot
You can also follow the link below to install the Chinese input method
https://blog.csdn.net/weixin_41275422/article/details/104500683
http://www.360doc.com/content/20/0501/13/40492717_909598661.shtml
2. Configuration environment
2.1 configuring CUDA
Open the terminal and enter
sudo gedit ~/.bashrc
Add the following code on the last side of the open document:
export CUDA_HOME=/usr/local/cuda-10.2
export LD_LIBRARY_PATH=/usr/local/cuda-10.2/lib64:$LD_LIBRARY_PATH
export PATH=/usr/local/cuda-10.2/bin:$PATH
ctrl+s to save the document, then exit the document, and then execute the following on the above terminal:
source ~/.bashrc
Check whether it is successful. If it is successful, the version number of CUDA will appear:
nvcc -V #If the configuration is successful, you can see the version number of CUDA
If the configuration is successful, you can see the version number of CUDA
2.2 modify the video memory of Nano board
1. Open the terminal input:
sudo gedit /etc/systemd/nvzramconfig.sh
2. Modify nvzramconfig SH file:
Find the mem value in the open document and modify the mem value as follows:
Found  mem = $((("${totalmem}"/2/"${NRDEVICES}")*1024))
We modified it mem = $((("${totalmem}"*2/"${NRDEVICES}")*1024))
Change / to*
3. Restart:
reboot
4. Terminal input:
free -h
You can see that swap has changed to 7.7G
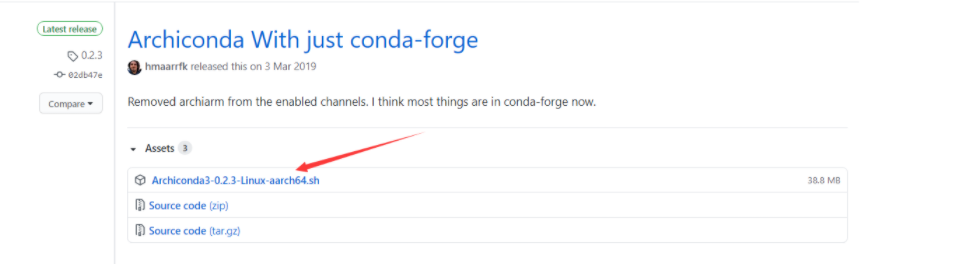
3. Install archiconda (that is, anaconda on the jetson nano board)
Because Anaconda does not support the arm64 architecture, the Jetson nano development board cannot successfully install Anaconda (this is a huge pit. I found that Anaconda cannot run on Jetson nano after stepping on this pit for a long time). Archiconda is a CONDA distribution version for 64 bit ARM platform, After archiconda is installed, we can use the idea of fluent use of CONDA on win10 system to install packages and run scripts. Do you feel very familiar with it.
1. Download address:
https://github.com/Archiconda/build-tools/releases
2. Installation:
Find the folder where you downloaded the archiconda package, open the terminal in your folder, or cd the folder, and then execute:
sudo apt-get install Archiconda3-0.2.3-Linux-aarch64.sh
It needs to be confirmed all the time during installation. Press enter to make all defaults. It may take a little time
3. Test conda:
Close the above installation terminal, open a new terminal on the desktop and enter the conda environment:
source archiconda3/bin/activate
If you cannot enter the base environment, you need to configure the environment variable
The configuration process is as follows:
sudo vim ~/.bashrc
Add the following code to the last line of the open document:
export PATH=~/archiconda3/bin:$PATH
4. Create a virtual environment running yolov5:
After entering the base environment of conda:
conda create -n  yolov5_py36 python=3.6 #Create a python 3 6 environment
conda info --envs  # View all environments
conda activate yolov5_py36  #Enter the environment
conda deactivate # Exit environment
5. Add the source image in conda
Enter the following codes in sequence:
conda config --add channels https://mirrors.tuna.tsinghua.edu.cn/anaconda/pkgs/free/
conda config --add channels https://mirrors.tuna.tsinghua.edu.cn/anaconda/cloud/conda-forge
conda config --add channels https://mirrors.tuna.tsinghua.edu.cn/anaconda/cloud/msys2/
conda config --add channels https://mirrors.tuna.tsinghua.edu.cn/anaconda/cloud/pytorch/
Add source image as default URL
First install pip:
sudo apt-get update
sudo apt-get upgrade
sudo apt-get dist-upgrade
sudo apt-get install python3-pip libopenblas-base libopenmpi-dev
pip3 install --upgrade pip		#If pip is up-to-date, it can not be executed
Then add Tsinghua source as the default URL
pip config set global.index-url https://pypi.tuna.tsinghua.edu.cn/simple
If we report a channel error when installing a package later, we can remove the Tsinghua source image. Here is a removal command, install the wrong package or environment, and then add the above codes in turn:
View mirror source command: conda config --show channels
 Remove Mirror Source command: conda config --remove-key channels
4. Install pytorch and trochvision (the most important place)
Baidu cloud download link:
Link: https://pan.baidu.com/s/1-V4wxcSa2gOgbOuHiULh7Q
Extraction code: qs5m
After downloading, you will see a whl file and torchvision file. pytorch is an installation package that can be installed directly. Torchvision is a folder that needs to be installed
Manual installation.
1. Install pytorch
Enter our yolov5 running environment
conda activate yolov5_py36
Then find the downloaded torch-1.8.0-cp36-cp36m-linux_ aarch64. The folder where the WHL package is located. Enter the folder and enter the installation command:
pip3 install torch-1.8.0-cp36-cp36m-linux_aarch64.whl #Note the location of the installation package
2. Test whether pytorch is successfully installed:
python #Enter python encoding
Input:
import torch
Re enter:
print(torch.__version__)
When you see the version number of torch, torch is installed successfully
3. Install the trochvision
Enter the trochvision folder,
Execute command:
export BUILD_VERSION=0.9.0
Then execute the installation command:
python setup.py install
It takes a long time to wait
4. Test whether the trochvision is successfully installed
Enter python encoding:
python
Execution:
import torchvision
Re execution:
print(torchvision.__version__)
You can see the torchvision version number. It is successful. The installation is almost successful here. Next, just enter the yolov5 folder and it will be completed.
5. Build YOLOv5 environment
Or are we yolov5_py36 environment
Enter the YOLOv5 code folder, where the author's code of this version is provided. Baidu cloud download link:
Link: https://pan.baidu.com/s/1-3SNkQUIOGTGxgiRDVQltA
Extraction code: zvxb
Yolov5s has been placed in the folder PT weight file, do not need to download separately.
cd goes into our yolov5 maser folder
Then execute the following command to install other running environments:
pip install -r requirements.txt
Because we replaced the Tsinghua source image earlier, the download speed is still very fast, waiting for the installation to complete.
1. Test yolov5
python detect.py --weights yolov5s.pt
Wait and run successfully as follows:
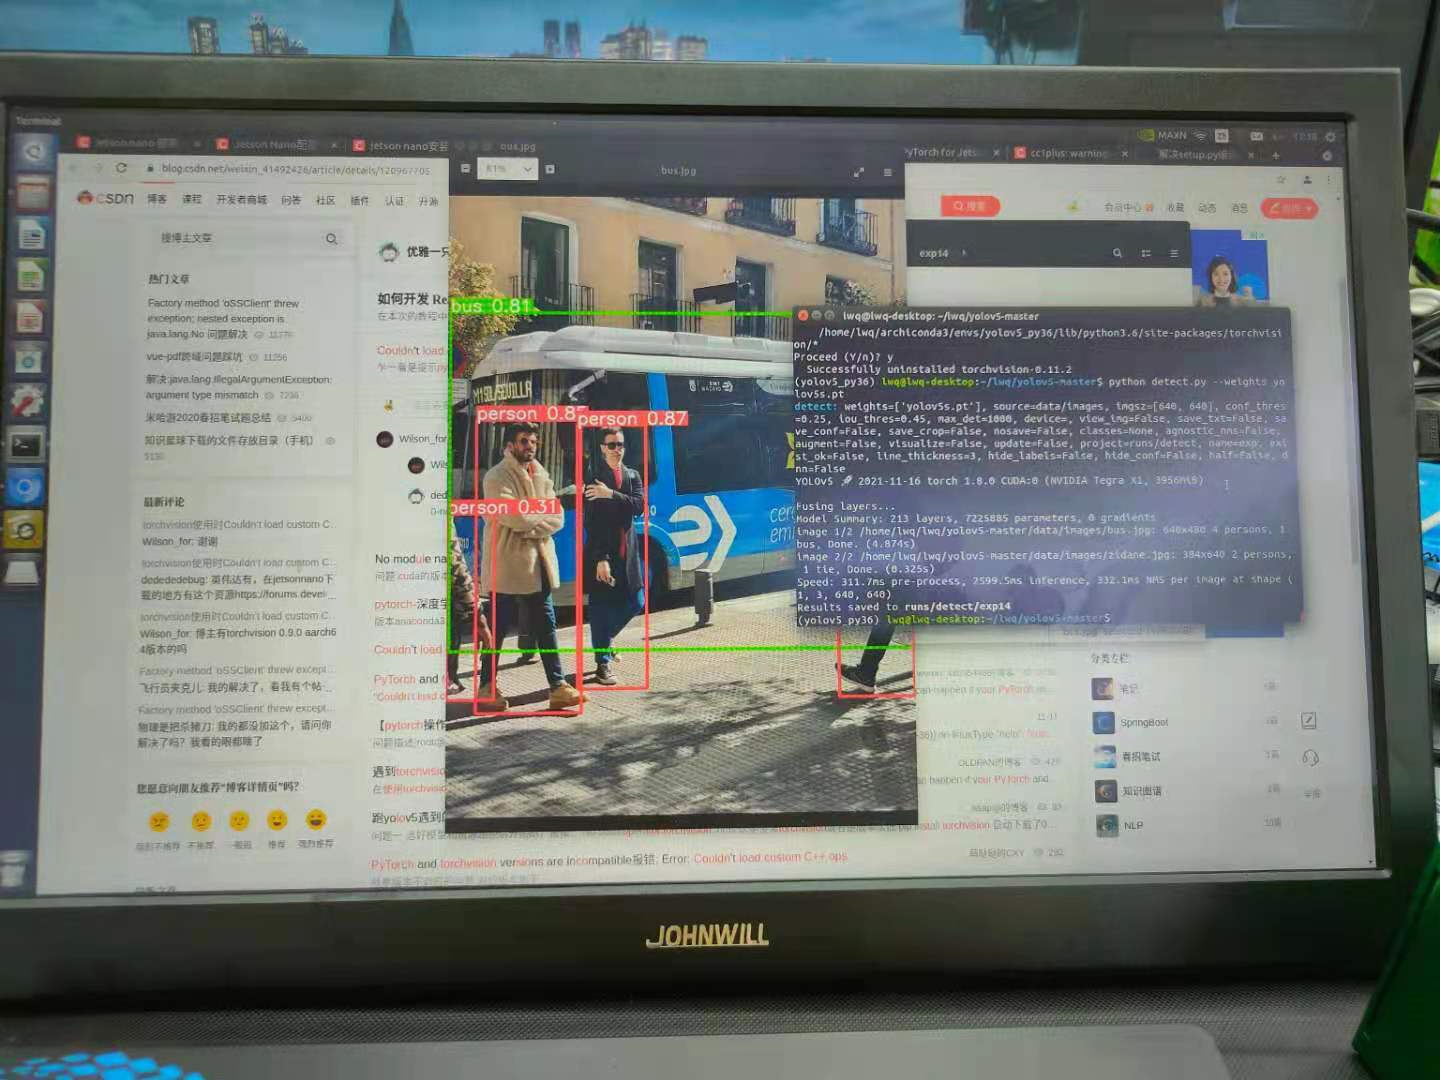
The author also tried to call the camera for detection. The image resolution is set at 480. The reasoning speed of each frame of image can reach about 0.09 seconds, which is several times faster than the pure CPU on the i7 system.
6. Reference
1.https://blog.csdn.net/carrymingteng/article/details/120978053
2.https://blog.csdn.net/weixin_41275422/article/details/104500683
3.https://qianbin.blog.csdn.net/article/details/103760640
summary
After completing the deployment, I stepped on a lot of pits, and there are many online deployment tutorials. The author also deployed this thing for the first time. It is also a pure white, in which there will be many mistakes. I hope you guys can correct it, and we can learn and make progress together.
In the future, we should try tensorrtx to speed up reasoning and deploy yolov3 tiny for lightweight networks.