Original link: http://www.juzicode.com/archives/5323
Return to opencv Python tutorial
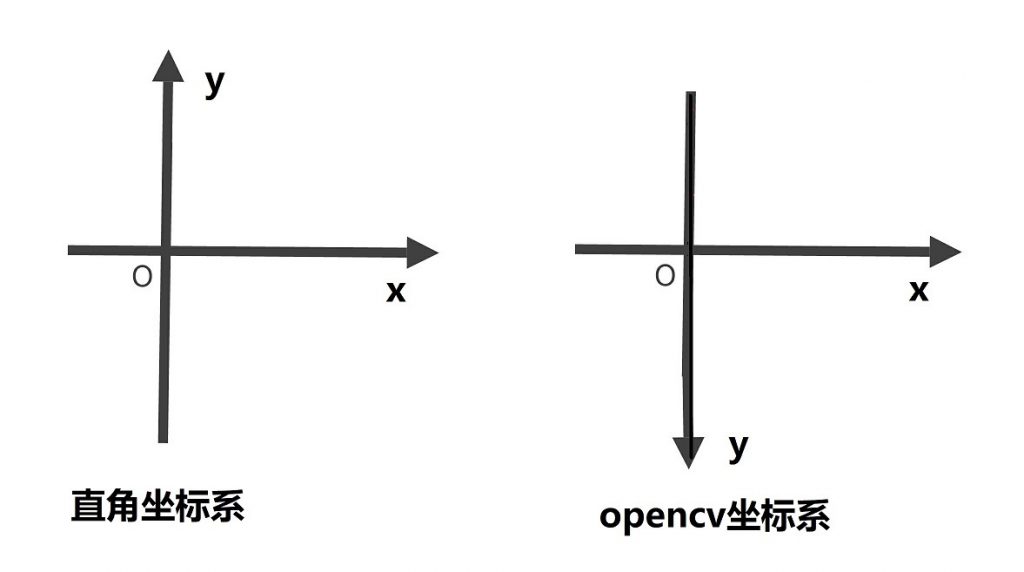
Because the drawing operation requires parameters such as the coordinates of the starting point and the ending point, it is necessary to understand the coordinate representation method of the image pixel position in OpenCV before drawing. Generally, the Cartesian coordinate system we use grows right in the x axis and up in the Y axis, but in the OpenCV image, y grows downward, that is to say, the coordinates of the vertices in the upper left corner of a picture are (0,0), which is also in line with human reading habits from left to right and from top to bottom.
Another difference from common sense is that we often say "R-G-B" three primary colors. A pixel can be combined into various colors with R, G and B pixels, but in OpenCV color image, a pixel is organized according to "B-G-R" mode.
Some common parameters of drawing operation function:
- img: image object.
- Color: color. If it is color, it is represented by a triple. The elements of the triple are organized according to B-G-R. in the triple (0255,0), B, R are 0 and G is 255, so it represents pure green. If it is grayscale, it is represented by a single value
- thickness: line width.
- Point: the point position is represented by a binary. The binary elements are organized according to x-y. for example, (10,20) represents the position of x=10 from left to right and y=20 from top to bottom.
- lineType: line type. CV2 is usually used when drawing curves LINE_ AA can have better smoothing effect.
1. Straight line
Knowing two points in a coordinate system, the connecting line between the two points forms a straight line, so drawing a straight line requires the x-y coordinates of the starting point and the ending point.
The drawing method is CV2 line(),
- The first position parameter is the image instance to be drawn.
- The second parameter is the starting point, binary.
- The third parameter is the end point, binary.
- The fourth parameter is color.
- The fifth parameter is lineweight.
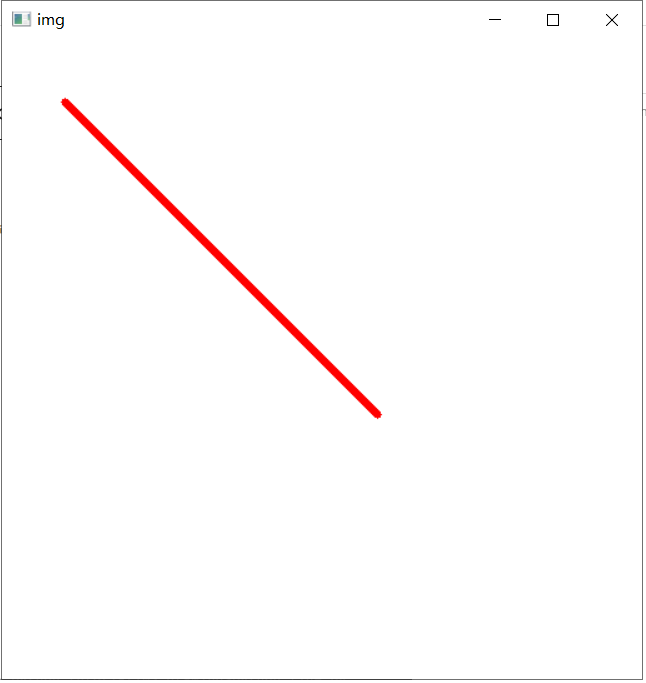
First build a 512 with numpy × 512 size pure white picture object: IMG = NP Ones ((512512,3)), the starting point is start=(50,50), the end point is stop = (300300), the color is set to red color = (0,0255), and the linewidth thickness = 5:
import cv2
import numpy as np
print('VX official account: Orange code / juzicode.com')
print('cv2.__version__:',cv2.__version__)
img = np.ones((512,512,3))
start=(50,50)
stop=(300,300)
color=(0,0,255)
thick=5
cv2.line(img,start,stop,color,thick)
cv2.imshow('img',img)
cv2.waitKey()
Operation results:
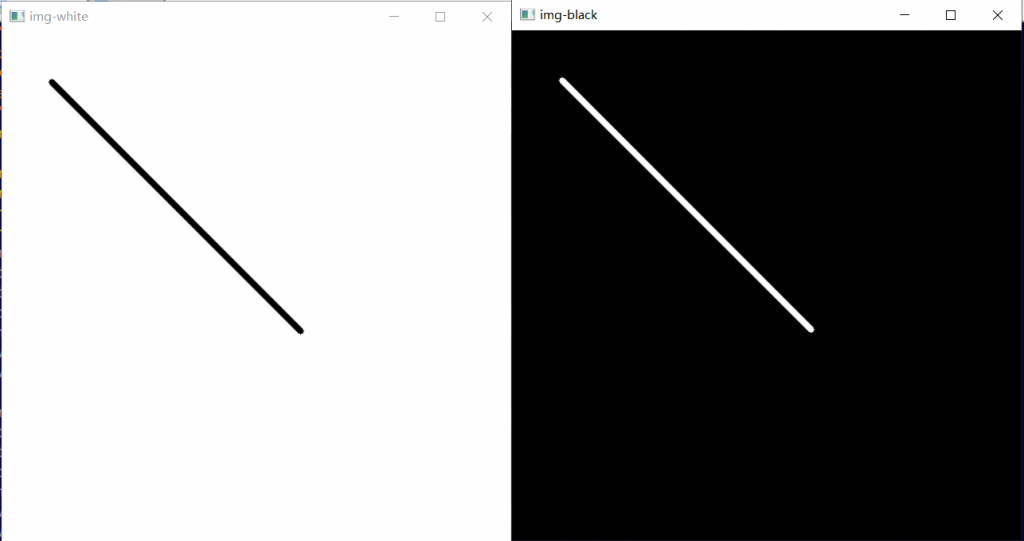
If the gray-scale image is used, img is constructed into a single channel image. Although the color can be represented by triples, only the 0th element is actually used. On a white background, a value of 0 represents black, and a value greater than 0 on a black background represents white:
import cv2
import numpy as np
print('VX official account: Orange code / juzicode.com')
print('cv2.__version__:',cv2.__version__)
img = np.ones((512,512)) #White background
start=(50,50)
stop=(300,300)
color=(0,255,255) #Black lines are displayed on a white background. Although the color can be represented by triples, only the 0th element is actually taken
thick=5
cv2.line(img,start,stop,color,thick)
cv2.imshow('img-white',img)

img = np.zeros((512,512)) #Black background
start=(50,50)
stop=(300,300)
color=1 #White lines are displayed on a black background, which can be greater than 0
thick=5
cv2.line(img,start,stop,color,thick)
cv2.imshow('img-black',img)
cv2.waitKey()
Operation results:
2. Round
Use CV2 Circle() draw a circle
- The first parameter is an image object;
- The second parameter is the center of the circle;
- The third parameter is radius;
- The fourth parameter is color;
- The fifth parameter is the line width. If - 1 is used, the interior of the circle will be filled automatically;
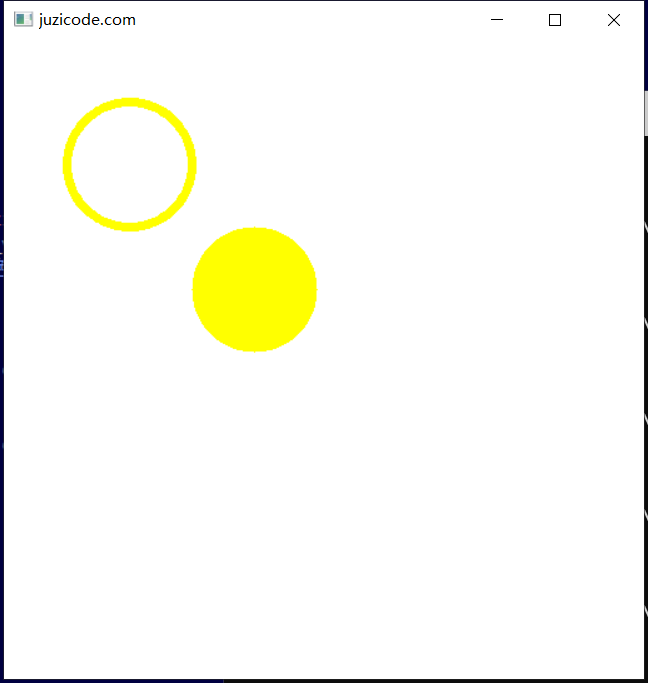
In the following example, draw a yellow outer frame hollow circle with a radius of 50 at the center (100100) and a solid circle with a radius of 50 at the center (200200).
import cv2
import numpy as np
print('VX official account: Orange code / juzicode.com')
print('cv2.__version__:',cv2.__version__)
img = np.ones((512,512,3)) #White background
center=(100,100)
radius=50
color=(0,255,255)  #yellow
cv2.circle(img,center, radius, color, 5) #line

center=(200,200)
cv2.circle(img,center, radius, color, -1) #fill
cv2.imshow('img',img)

cv2.waitKey()
Operation results:
3. Square
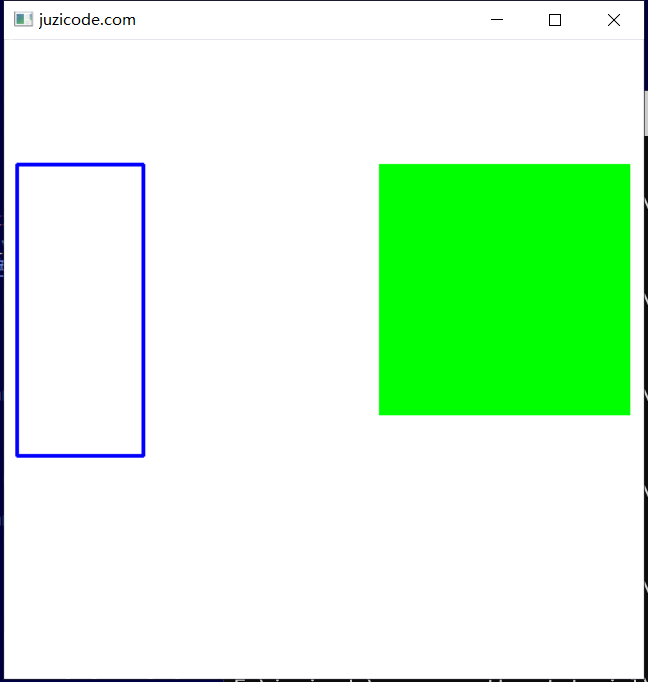
cv2.rectangle() is used to draw squares, including rectangles and squares.
- The first parameter is the image object;
- The second parameter is the coordinate of the upper left corner of the square;
- The third parameter is the coordinates of the lower right corner of the square, and the width and height of the square are automatically calculated according to the coordinates of the starting point;
- The fourth parameter is color;
- The fifth parameter is the line width. If - 1 is used, the interior of the circle will be filled automatically;
The following example draws two squares:
import cv2
import numpy as np
print('VX official account: Orange code / juzicode.com')
print('cv2.__version__:',cv2.__version__)
img = np.ones((512,512,3)) #White background

topleft=(10,100)
downright=(111,333)
color=(255,0,0)  #blue
cv2.rectangle(img,topleft, downright, color, 2) #line

topleft=(300,100)
downright=(500,300)
color=(0,255,0)  #blue
cv2.rectangle(img,topleft, downright, color, -1) #fill

cv2.imshow('juzicode',img)

cv2.waitKey()
Operation results:
Summary: This paper introduces how to draw straight lines, circles and squares in OpenCV images. Most of them draw squares. For example, when face recognition, the face part is marked with boxes.